Christmas Cake (Cheat)

There is obviously not enough time to make a traditional fruit cake now. Dousing the cake in alcohol alone will take me at least a week! A non-alcoholic rendition might work for some but its flavor is not as rich and deep as the alcohol-soaked, aged traditional fruit cake. *sighs*
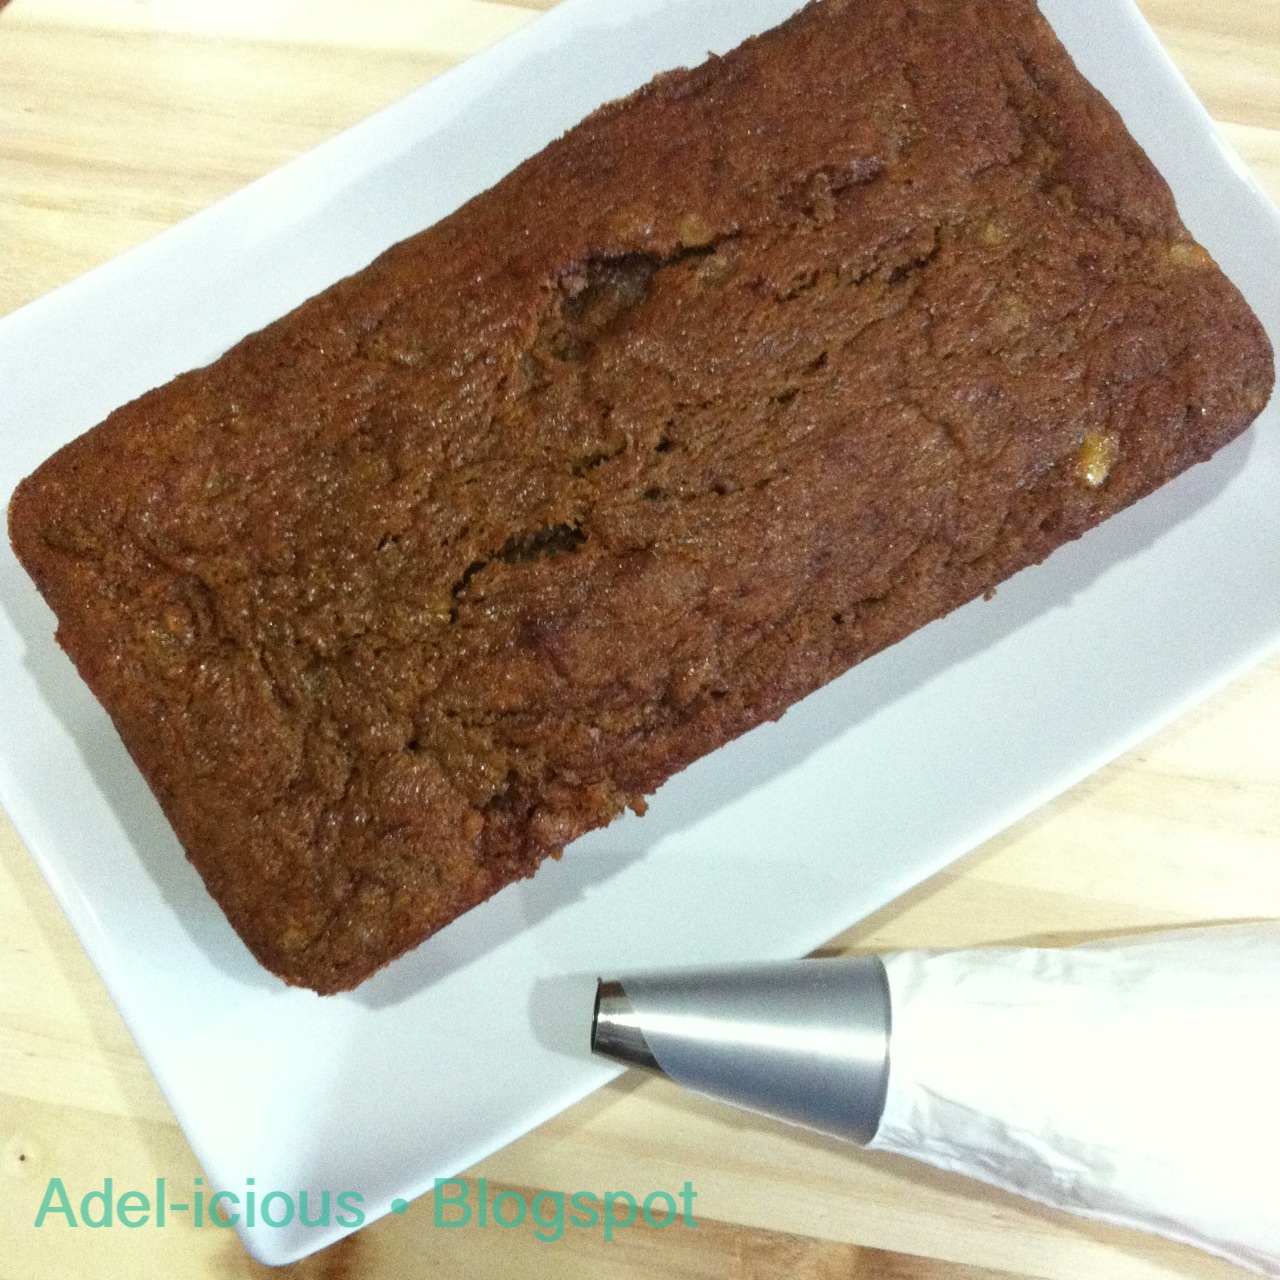
With less than 2 days away from Christmas Eve, I've decided to "play cheat" and took a shortcut by making us a banana cake! Banana is a fruit so technically it is still a "fruit" cake! Anyway, in our current kaleidoscopic world of pastries, not that many people likes fruit cakes any more, right? *self-deluding* >.<
What you'll need:

Banana Cake (any shape you like)
Frosting
Fruits or Figurines for decoration
Snow Powder
Pinch of Cocoa Powder

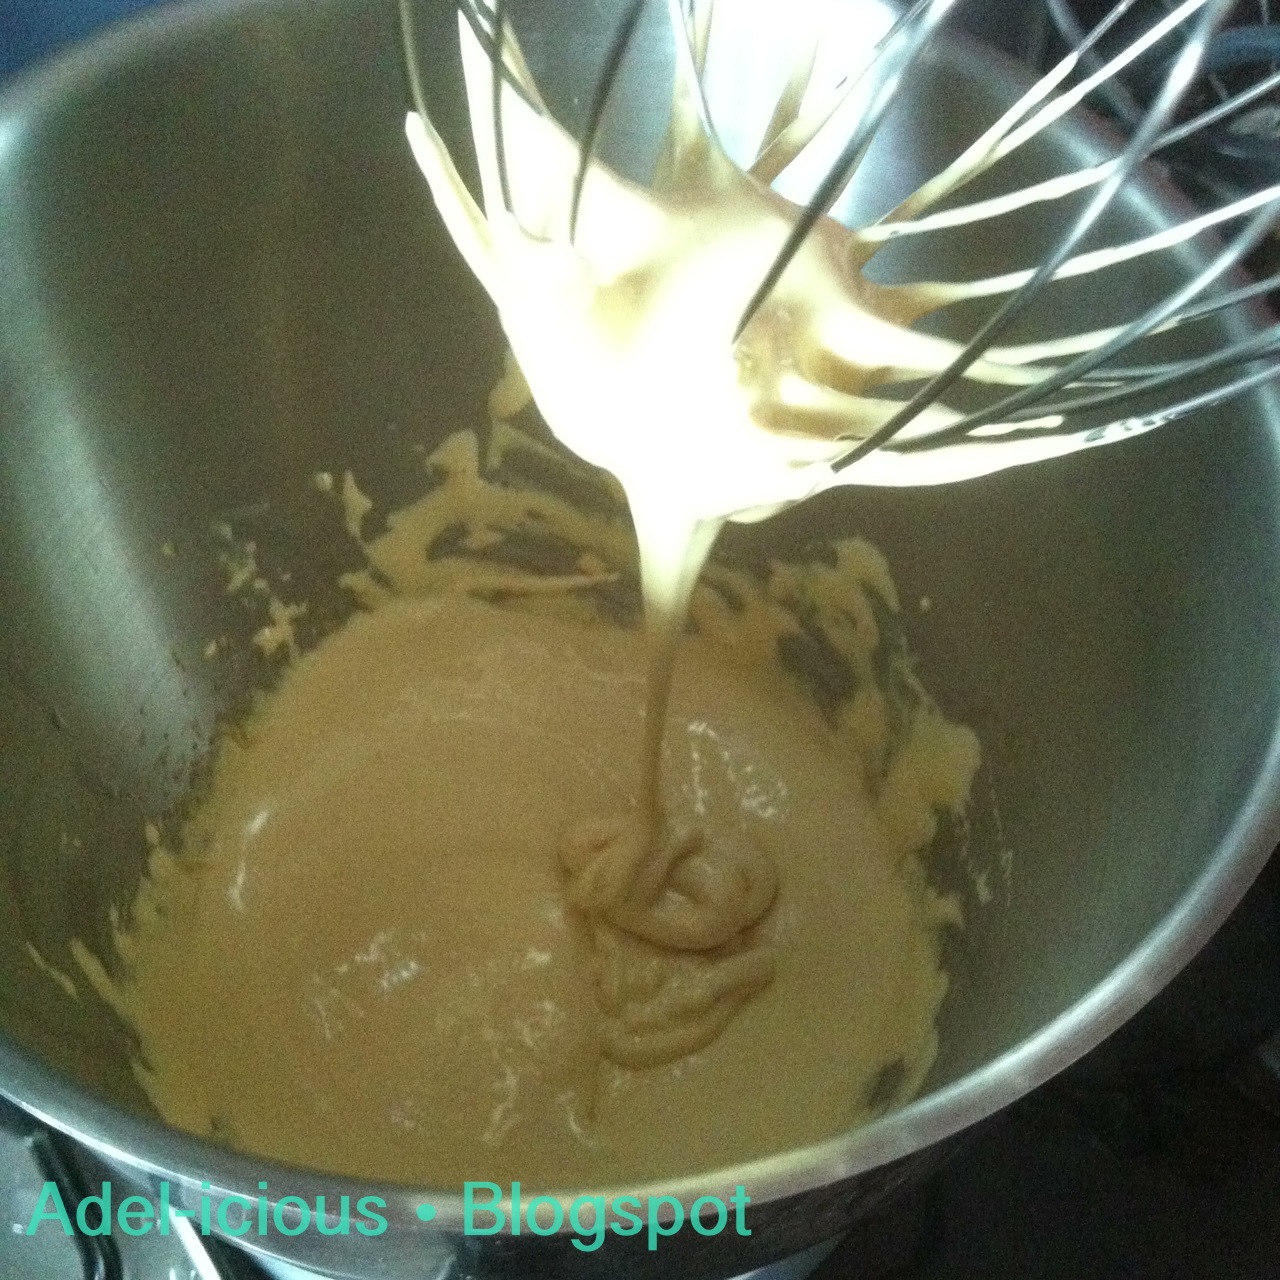
1. Prepare Banana cake and let cool completely. You are welcome to use your favourite Banana cake recipe instead of mine.

2. With a little creativity, frost and decorate in any way you like!
You can also bake them in the form of cupcakes and share the <3 with a few friends like I did! Christmas is all about the giving spirit anyway!
You are welcome to use other things as decorations but personally, I think Banana cake with Strawberries and Cream can never go wrong!


All blog posts and photos are properties of WhatToBakeToday (unless otherwise stated). Unauthorized use and/or duplication of these contents, whole or part thereof, without express or written permission from this blog's author is strictly prohibited. Excerpts and links may be used, provided that full and clear credit is given to WhatToBakeToday with appropriate and specific direction to the original content. 

Eggnog Créme Brûlee Tart

Christmas is around the corner again! Woohooo~ It's the time to mess up the kitchen and create a whole load of sweets for family and friends! Bûche de Noël, fruit cakes, stollen, mincemeat pies, Christmas puddings and of course, Christmas cookies!!
But this time, I've decided to try my hands on something less than common -- Eggnog Créme Brûlee Tart! I shamelessly admit that I got the idea from Napa Rose Restaurant located in Disneyland USA's but it is eggnog in créme brûlee style baked in a sweet crust! Who can resist that thought?!

After much contemplation, I went with Alton Brown's Eggnog, using Gordon Ramsay's Sweet Crust and putting it together using a recipe from Chow.com. I think the last step should be redundant since the ingredients, proportion and preparation for eggnog is (almost) the same as custard itself. But just to be safe, I've decided to follow the recipe anyway.

Eggnog Crème Brûlée Tart
A batch of sweet pastry crust

 170g     Eggnog
 179g     Heavy Cream
 122g     Whole milk
    5        Large egg yolks
   67g     Sugar + extra to brûlee
Optional
1/8 tsp   Ground Nutmeg

Preheat oven to 150ºC


1. Using a whisk attachment, whisk together the egg yolks and sugar until color is pale and volume has doubled. Meanwhile, combine the eggnog, cream, milk, and nutmeg in a medium saucepan and bring to a simmer over medium heat.

2. Remove saucepan from heat and gradually temper the eggnog mixture into the yolks while whisking constantly. I.e. add the hot eggnog in a slow, steady stream while whisking to prevent from cooking the egg yolks. Adding too fast will result in curdled eggs.

3. Slowly pour the custard mixture into the tart shells (or ramekins), try to fill as much as you can. Bake for 25-35mins on the middle rack till the custard is set but the center is slightly jiggly when rotated. If using ramekins, bake in a water bath for about the same time till the custard is set but center is jiggly.

4. Remove from oven and let cool the tarts (and/or ramekins) completely before refrigerating for 2-4 hours. 
5. When ready to serve, sprinkle an even layer of approximately 2 tsps of sugar over the tarts' top (may use brown sugar, but they're not as pretty). Using a kitchen blowtorch, carefully caramelize the sugar till golden brown, avoid charring the sugar. Serve immediately. 
With a few handmade Christmas motifs toppers, they kind of look like cupcakes, don't they?! My "supposedly" snowman looks utterly horrendous, I can't draw anything with eyes and nose (or mouth in this instance). I'm sorry if I gave any kids nightmare. Hahaha..
This is a great Christmas party food idea especially if you are also serving up eggnog, it'll save you a little time. Even if you don't have time to make the sweet crust pastry, you can simply bake them in a ramekin. Whipping some of the leftover whites as a meringue topping and going over it with a blowtorch will work beautifully too!
Guests who don't dare to try the eggnog drink have a chance to taste how eggnog is, although I would say they are still not quite similar but... I guess that's about the closest you can get! Hahaha.. Together with some Christmas cookies, few slices of fruit cakes, perhaps a cheese and prosciutto platter, they make a wonderful pre-dinner snack while the guests mingle and chat. Some might frown at the idea of having sweets before dinner, not for me! It'll actually make me look forward to having the Bûche de Noël (if any) at the end of the meal!

OK, maybe it's just me 'cause I'm too much of a glutton! Hahaha.. Merry Christmas (preparation) everyone!! 

**I have created this bake to submit to "Aspiring Bakers #26 – Creative Christmas Motif Bakes! hosted by Alan of Travellingfoodies" which Alan has warmly invited me to**


All blog posts and photos are properties of WhatToBakeToday (unless otherwise stated). Unauthorized use and/or duplication of these contents, whole or part thereof, without express or written permission from this blog's author is strictly prohibited. Excerpts and links may be used, provided that full and clear credit is given to WhatToBakeToday with appropriate and specific direction to the original content. 

Egg Nog

Being as adventurous in food as I am, I haven't had the chance to taste eggnog until Christmas dinner, 2 years ago at one of our iconic hotels, yet it wasn't an exceptionally pleasant one. When I put the glass to my lips, even before tasting, the server warned me that "this contains raw eggs". Err... Thanks? I didn't know that so I hesitated a little. Hahaha.. I remembered they were very generous with their alcohol; I thought eggnog is a sweet concoction so I didn't expect the alcohol to assault my nostrils the way wasabi does, as it vaporizes. My first impression of eggnog is a super sweet and creamy drink, heavily spiced with a "healthy" boost of alcohol. I was guessing perhaps it was so to mask the egginess of raw eggs, but it was not something I would like to try again and I left with a bad taste in my mouth, literally.
Not until a few days ago, that is. LOL! I was brainstorming for Christmas bakes ideas good enough for " Aspiring Bakers #26 – Creative Christmas Motif Bakes! hosted by Alan of Travellingfoodies" which Alan warmly invited me to join and of course, eggnog was on the list. Meh... I should give it another chance. Using Alton Brown's recipe, I realized it's not such a bad drink afterall! I made some slight modifications the following time, just so it suits our preference and it's even better!

Since it was a test batch, I halved the recipe. Oh, if you don't have bourbon, these alcohol might do the trick too. Give it a try, experiment! =)
Egg Nog (makes 4 small servings)
Mixture A
      2       Eggs
      2       Egg yolks
    50g     Sugar

Mixture B
  488g     Milk
  238g     Heavy Cream
    20g     Honey
      1g     Ground Nutmeg

Optional
    60g     Bourbon
      2       Egg Whites + 5g  Sugar

1. Using a whisk attachment, whisk (A) at maximum speed till colour lightens and is light and fluffy.

2. In a saucepan, over high heat, bring mixture (B) just to a boil while stirring occasionally.

3. Remove from heat and gradually temper the hot (B) into (A). I.e. continue whisking (A) while adding (B) in a slow steady stream. Add too fast and there will be curdled eggs. XD

4. Return everything to pot and cook until mixture reaches 70º C. Remove from heat, stir in the bourbon (if using) and chill in refrigerator.

5. (If using), whisk egg whites till stiff peaks before whisking into the chilled mixture. Serve immediately.
Some people still can't quite get pass the idea of eating raw eggs, so I think it's best to leave the option open, whether to add the egg whites or not. A great party idea would be to chill them in little jars like above and let your guests decide if they want the egg white. Or alternatively, use some whipped cream in its place or even a scoop of vanilla ice cream! That will really kick it up a notch! Or if feeling more adventurous, add a dash of nutmeg and cinnamon before serving, they go really well with the floral after taste of the honey!


All blog posts and photos are properties of WhatToBakeToday (unless otherwise stated). Unauthorized use and/or duplication of these contents, whole or part thereof, without express or written permission from this blog's author is strictly prohibited. Excerpts and links may be used, provided that full and clear credit is given to WhatToBakeToday with appropriate and specific direction to the original content. 

Strawberry Lavender Chiffon Cake

When Kimberly invited me to join the "Recipe with Photos Contest" she is hosting, I am honoured and truly flattered. She has a small farm with an amazing view and does things we can only dream of in Singapore (owning a big piece of land which they consider small. XD). Farming, raising animals, bee keeping, wine making and beer making! And the food they create never fail to wow me! Not to mention they have a smoker in their backyard where they smoke beautiful hunks of meat. That's the number 1 thing I'll like to do in Singapore without running the risk of being charged with attempted arson! LOL!
Even though Kim said that the recipe used for the contest doesn't have to be "original", I want to create something for them at the very least. Since their website is "Purple Goo", I thought of making a Lavender chiffon for them. You know.... PURPLE goo. Heehee... But I know the smell/taste of Lavender is quite daunting to most people, especially in a region where Lavender is frequently used as the fragrance for cleaning agents, be it body shampoo or the floor cleaning detergents. So I decided to pair it with the sweet smell of strawberries to slightly tame the strong lavender, and also for the extra girlish touch
As usual, I am just modifying the recipe I've grown accustomed and it took me 3 attempts before getting the flavours right (for myself). I wouldn't say the "recipe is mine" so feel free to adjust the flavours and sweetness to your preference. =)

Strawberry Lavender Chiffon Cake (yields 21cm tube tin)
(modified from Richard Goh's recipe)

Mixture A
     5       Egg Yolks
   40g     Sugar

Mixture B
   60g     Corn Oil
   70g     Water, warm
     2g     Lavender (may reduce to 1g)
   20g     Strawberry Paste
Optional
*a few drops of food colouring*

Mixture C
   75g     Top Flour (may sub with Cake Flour)
   35g     Corn Flour

Mixture D
     5       Egg Whites
   80g     Castor Sugar

Preheat oven to 170º C
1. Soak the Lavender in warm water for approximately 10-15 mins before adding the Strawberry paste. Stir to dissolve, add in the corn oil and stir till homogeneous. Let cool and reserved.
2. Sift together (C), whisk briefly and reserved.

3. Using a whisk attachment, whisk (A) at maximum speed till colour turns pale and volume has doubled. Usually takes less than 2mins on my stand mixer.

4. Reduce the speed of mixer and slowly add in (B) till incorporated. Add in (C) and whisk till batter is thick, smooth and lump-free. Transfer batter to another bowl, wash and clean mixer thoroughly.

5. Using the whisk attachment, whisk the egg whites till almost soft peaks and gradually add in the sugar. Stop whisking when meringue turns glossy and just reaches stiff peaks.

6. Gently stir in 1/3 of the meringue into the batter to lighten the mixture before folding in the rest with a very light hand. Again, I highly recommend using hands. If uncomfortable, any other apparatus will work. Spatula, whisk or wooden spoons. Fold in, stir in, cut in, clockwise, anti-clockwise, anything! It doesn't matter as long as you maintain a gentle touch, it will work.
7. Sharply rap the bowl against the counter top a couple of times to release trapped bubbles before pouring into the tube (aka chiffon) tin.

8. Place the cake at the lowest possible rack and bake for 45-55mins till cake tester/skewer comes out clean.

9. Immediately turn the tin over and elevate it using a bottle/funnel and let cool completely.
10. When completely cooled, insert a sharp knife and go around the sides to release the cake. Try to use one swift movement and keep the blade as close to the tin as you can. Repeat the same for the bottom of the cake. Voila, you're done!
At first glance, the amount of strawberry paste added might seemed way too much, you are welcome to reduce to your liking but bear in mind that Lavender is a really strong smelling flower. There wasn't any strawberry taste/smell in my first 2 attempts, not even the slightest hint, so you can reduce the Lavender to 1g if you like. And for regions where strawberry paste is not available, you may substitute with strawberry emulco/flavouring. I wouldn't advise using fresh strawberry purée if the paste/emulco/flavouring are not available though, it might weigh down the chiffon.

Over 80% of the people who had tasted this flavour commented that it reminded them of cleaning agents. What can I do to help rid that impression? *face palm*


All blog posts and photos are properties of WhatToBakeToday (unless otherwise stated). Unauthorized use and/or duplication of these contents, whole or part thereof, without express or written permission from this blog's author is strictly prohibited. Excerpts and links may be used, provided that full and clear credit is given to WhatToBakeToday with appropriate and specific direction to the original content. 

Maple Pumpkin Custard Tart

I am not sure when did pumpkins became one of the symbolic representatives of bountiful harvest together with turkey, corn, cranberry, etc. but every year, starting from October, we see pumpkins everywhere. Scary faces carved into pumpkins for Halloween in October, pumpkin pies for Thanksgiving in November and also for Christmas in some parts of the world.

I don't think pumpkins are the dominant vegetable harvested in autumn, pretty darn certain that a whole load of other crops mature the same season. I'm leaning towards the whole "storing food for winter", "before the lands become fertile again" thing. Pumpkins can last up to 3 months if properly stored and not to mention that almost every part of the pumpkin can be eaten! It only makes sense (to me) that pumpkins became popular with the folks of yonder years due to its pragmatism. Then again, this is just my deduction, I'll just leave the guessing and explaining to the anthropologists.
I am not sure since when pumpkin pies became a traditional dish for Thanksgiving (and Christmas in some places). Even though I tried to create a lighter pumpkin cake with my "Japanese" Pumpkin Cake, some traditions are meant to be followed (yes, sometimes blindly, when it's a good tradition =P). Since I still have the maple pumpkin custard recipe I "created" last year by merely following the basic custard ratio and armed with one of Gordon Ramsay's recipe, yes I'm ready to go make myself a Maple Pumpkin Custard tart. LOL!

Maple Pumpkin Custard Tart (2 x 8" tarts)

A batch of Sweet Crust Pastry

For Custard: 
Mixture A 
      3       Eggs
      4g     Vanilla Extract
    20g     Brown Sugar
      1g     Salt
Optional
      1g     Ground Cinnamon
     0.5g   Ground Ginger
     0.5g   Ground Nutmeg

Mixture B
  400g     Pumpkin Purée
    60g     Maple Syrup
  180g     Heavy Cream
  180g     Milk

Preheat oven to 150ºC
1. Whisk together (B) over LOW heat, taking care not to boil the mixture. Make sure there are no visible lumps and remove from heat after about 5mins.
2. Whizz together (A) in a food processor and slowly add (B) into (A) while the food processor is operating. Do not add too fast or too much at all time else the eggs might get cooked. To ensure a smooth consistency, pass the combined mixture through a sieve.
3. Slowly pour the custard mixture into the pie shells (or ramekins), try to fill as much as you can. Bake for 30-45mins on the middle rack till the custard is set but the center is slightly jiggly when rotated. If using ramekins, bake in a water bath for about the same time till the custard is set but center is jiggly.

4. Let cool completely before refrigerating for 2-3 hours (best if overnight).

Sadly, spiced desserts are still slightly challenging for Singaporeans to accept. So until they find a place on Singaporeans' taste buds, I would advise omitting the spices altogether. The above custard recipe yields a denser custard, if you are after a "lighter"and silkier texture, you may decrease the pumpkin purée to 300g and increase to 4 eggs. And by all means, you are welcome to adjust the sugars to your tolerance level although I might suggest not altering much of the Maple syrup, if not defeats the purpose of the dessert's name.
When serving, you may serve it chilled, warm or at room temperature. You may dust some confectioner's sugar over the top, or some ground cinnamon/nutmeg if you like heavily spiced desserts. For an expensive and delicate feel, you may even want to "brûlé" your tart by spreading a layer of sugar on top and caramelizing them with a culinary blow torch. Or my favourite way and genuinely thinks it should be everyone's favourite way, is to simply serve up with a dollop of vanilla ice cream or freshly whipped Crème Chantilly, garnished with some pecans or walnuts for textural contrast. Happy Thanksgiving!


All blog posts and photos are properties of WhatToBakeToday (unless otherwise stated). Unauthorized use and/or duplication of these contents, whole or part thereof, without express or written permission from this blog's author is strictly prohibited. Excerpts and links may be used, provided that full and clear credit is given to WhatToBakeToday with appropriate and specific direction to the original content. 

Japanese Pumpkin Cake

It is very challenging not to have pumpkin for Thanksgiving's dinner, it's like not having Hay Bee Hiam rolls or Pineapple tarts during Chinese New Year. It is equally challenging to come up with a "pumpkin-something" that Singaporeans might like, something not dense and heavy on spices like the traditional pumpkin cakes/pies.

When it comes to light texture, the first that hits me is Japanese Cheesecake. Never fail me, never fail anyone who put it to their lips. I did consider chiffon sponges but was worried that the heaviness of pumpkin purée might weigh down the airiness of the cake. 
The only thing I changed from the Japanese Cheesecake's recipe is only the pumpkin purée and brown sugar. I had wanted the cake to be strong on the pumpkin's taste, so I increased the purée amount to 400g. The heavenly aroma of pumpkin wafted from the kitchen as it was baked but the texture was too heavy and unlike that of the Japanese Cheesecake. I stuck to 250g for the second attempt, the texture is correct but it came at a price of decreasing the pumpkin's taste. I will probably go for 300g next, and it should be just about right. For now, I will still stick to 250g in the recipe but feel free to go ahead with any amount between 250g - 400g.

"Japanese" Pumpkin Cake (makes a 8"-9" round cake tin)

Mixture A
    6       Egg Yolks
  40g     Brown Sugar (can switch back to white if desired)

Mixture B
 250g     Pumpkin Purée
 100g     Milk
   50g     Butter, unsalted
Optional
few drops of orange colouring

Mixture C
   60g    Cake Flour / Plain Flour
   20g    Corn Flour
  1.5g    Salt
Optional
     2g    Ground Cinnamon
     1g    Ground Nutmeg
     
Mixture D
     6       Egg White
 100g     Confectioner's Sugar
1/4tsp    Cream of Tartar

Preheat oven to 160º C

1. Line and grease the cake tin. Melt (B) over double boiler and let cool. Double sieve (or triple sieve if you like) mixture (C) and reserve.
2. Using a whisk attachment, whisk egg yolks and sugar till pale and volume has doubled. Slowly add in (B), whisk briefly before adding (C) and whisk till combined. Consistency should be smooth and thick with a few small lumps from the purée. Have the mixture push through a sieve if you want a lump-free batter.

3. Whisk egg white with cream of tartar till foamy before adding the Confectioner's sugar and continue whipping till stiff peaks. Bring a pot of water to boil.
4. Stir in a 1/3 of the meringue (D) to lighten the thick batter before folding in the rest with a very light hand. Again, I highly recommend using hands. If uncomfortable, any other apparatus will work. Spatula, whisk or wooden spoons. Fold in, stir in, cut in, clockwise, anti-clockwise, anything! It doesn't matter as long as you maintain a gentle touch, it will work. 
5. Pour batter into prepared tin and "slam" the tin 1 or 2 times to remove trapped bubbles. Put cake tin in basking tray and fill it halfway with the boiled water. Bake in water bath at the lowest rack for 50-60 mins, ensuring the water doesn't dry out. If the top browns too fast, you may either tent the cake using aluminium foil or place a baking sheet on the highest rack. Turn off the oven and leave the cake in oven for 30 mins with the oven door ajar.

6. Remove all parchment paper and leave on wired rack to cool completely (try not to flip and cool it on its face, else it will inherit the grids) before refrigerating it for 2-4 hours (best if overnight).
After setting it in the refrigerator, it is ready to be packed and brought along to Thanksgiving dinner. If you don't celebrate Thanksgiving, just slice them up and serve! 


All blog posts and photos are properties of WhatToBakeToday (unless otherwise stated). Unauthorized use and/or duplication of these contents, whole or part thereof, without express or written permission from this blog's author is strictly prohibited. Excerpts and links may be used, provided that full and clear credit is given to WhatToBakeToday with appropriate and specific direction to the original content. 

Fresh Pumpkin Purée

With Thanksgiving in less than a week, I presume it will be difficult to lay my hands on canned pumpkin (if they are available in our supermarkets at all in the first place).

The same season last year, I was frantically searching for canned pumpkin just so I could make some pumpkin pie. I didn't find any in the supermarkets (perhaps I didn't search thorough enough >.<) and I'm not sure if I would want to pay premium for canned pumpkin in a speciality store. 

If you have some time on your hands (and some elbow grease), I highly recommend making your own fresh pumpkin purée for your baking/cooking needs. Anything freshly made will beat anything canned, in terms of nutrition and flavour any time, hands down. 
Fresh Pumpkin Purée
  1kg     Pumpkin, skinned, seeded and cube
100g     Brown Sugar (not too sweet, increase as per desired)

Optional
   3g      Ground Cinnamon
   1g      Ground Nutmeg
   1g      Ground Ginger

1. There are 2 options for cooking the pumpkin:
  • Steam pumpkin over boiling water till the pumpkin can be easily mashed with a fork. This method is good for retaining the pumpkin's water content
  • Roast pumpkin on a generously greased baking sheet, skin left on and flesh side down, at 200ºC for about 30-40mins till soft. This method is good for providing an additional depth in flavour, however, the pumpkin tends to be drier. 
2. You may mash the pumpkin using a potato masher or with the good old fork. Alternatively, blend the pumpkin in a food processor. For smoother consistency, have the purée pushed through a sieve to remove any bigger pumpkin pieces. 

3. In a medium saucepot, add brown sugar and spices (if using) to the pumpkin purée. Cook over low heat till the colour darkens and mixture thickens slightly. Let cool completely and use in desired applications.

You can use the purée in your cakes, pies, kuehs, baos. In fact it will work for any recipes that call for canned pumpkin. Without the added brown sugar, it's the perfect baby food. When chilled, it is a healthy substitute for ice cream. They will store in the refrigerator for 1 week in an air tight container and up to 2 months in the freezer. So go ahead and whip up a large batch! =)


All blog posts and photos are properties of WhatToBakeToday (unless otherwise stated). Unauthorized use and/or duplication of these contents, whole or part thereof, without express or written permission from this blog's author is strictly prohibited. Excerpts and links may be used, provided that full and clear credit is given to WhatToBakeToday with appropriate and specific direction to the original content. 

Pain Perdu - French Toast

Pain Perdu (literally translated to "Lost Bread"), is nothing more than the fancy French name for the humble French Toast. Despite its French roots, I am sure none of us are strangers to this quick and easy breakfast/brunch dish. It is arguably, in my honest opinion, the best and simplest method to put those stale old bread to use. This was also what Mummy used to do when my sisters and I got sick of Kaya and Butter bread; we would chomp down the French toast instead of complaining "Huh..... Bread again ah?"

I'm not sure if the case is the same for anyone else but my Mummy's version of "localized" French toast is simply soaking the dried white bread (Gardenia, Sunshine, what have you not) in a sweetened, beaten egg mixture before pan-frying them. That's why I don't understand why/how a cafe/restaurant/hotel can command such an insane price for this simple fare. Even with this luscious Ladurée's recipe, I would rather continue to prepare them at home. =D

Ladurée's Pain Perdu recipe is an up-scale, upgraded version of what I grew up to. I would never have thought of trying this recipe if not for the fact I screwed up my Brioche by adding additional flour. The dry interior soaked up all that fat and flavour like a dried sponge. It was sooo sooo good!
For those who don't have time to make your own Brioche, feel free to use store bought ones. You may dried out the bread at a low oven temperature till the interior is dry to touch, instead of waiting for it to grow old and stale. =P

Pain Perdu - French Toast (recipe from Ladurée, serves about 4)
  1/2     Vanilla Bean or 2g Vanilla Extract
400ml   Heavy cream
    4      Egg Yolks
 80g     Sugar
    1      Brioche Mousseline, sliced about 2cm thick, may remove crust
 22g     Butter for skillet

1. With a sharp knife, slice the vanilla bean half lengthwise in two. Using the tip, scrape the interior to remove the seeds. Pour the cream into a saucepan, add the vanilla pod and seeds and bring to a simmer. Remove from heat, cover and allow to infuse for 1 hour until completely cool. Remove the vanilla pod. (If using Vanilla Extract, add extract to the cream and bring to a simmer. Let cool completely.)
2. In a large bowl, whisk the egg yolks and sugar until slightly pale. Add the vanilla infused cream, stirring in with a spatula.
3. Heat a knob of butter in a large skillet. Dip the brioche slices, tops and bottoms, in the above preparation and gently shake off any excess  Place in skillet, cook for approximately 1 min on each side until golden. Serve immediately.
Optional
  • You may coat the brioche slices with sliced almonds after dipping them into the cream/egg mixture.
  • You may dust the French toast with icing sugar or drizzle on maple syrup to serve.
  • You may serve the French toast with fruits, bacon, baked beans, eggs, cream cheese, marmalade, anything! Or if you like, more butter! 


All blog posts and photos are properties of WhatToBakeToday (unless otherwise stated). Unauthorized use and/or duplication of these contents, whole or part thereof, without express or written permission from this blog's author is strictly prohibited. Excerpts and links may be used, provided that full and clear credit is given to WhatToBakeToday with appropriate and specific direction to the original content. 

Brioche à Tête

Amid all the posts I had put up thus far, I realized there is one category I have yet to touch on. Breads. Yup, I love bread as much as I love my cakes, pastries and all my sweets. Dang, what am I talking about? I just love all food in general, isn't it? It is promptly reflected on my increasing body size! LOL!

Be it bread from the diminishing "old-school" bakeries in neighbourhood estates or the over-priced and overrated "fusion" breads from chain stores and of course, the "artisan" breads from internationally famous bakeries whose names my Mummy could not articulate, it does not matter, my love for them is equal!! And I do not just adore a particular type of bread, I have a whole list of favourites! Focaccia, Rye, Sourdough, just to name a few. And obviously, the focal interest of this post -- Brioche!

In my personal opinion, Brioche is one of the few highly versatile bread which compliments both savoury or sweet applications. Although in Singapore, they are usually made sweeter than the traditional rendition, skewing it towards the sweet bread category, it is not surprising to see various savoury applications in countries within the Europe region. Sadly in Singapore, they are most commonly projected as the main component of an upscale version of the Bread Pudding or often offered as French Toast in an absurdly priced restaurant. 

It is no secret that what makes Brioche so irresistible and sets it apart from its bread counterparts is its high butter and egg content, giving it a rich, buttery, alluring fragrance and a moist, fine-crumb texture, almost akin to that of a cake. Perhaps it would be most compelling to simply dubbed it as a "yeast-risen cake" as mentioned by Paul Allam and David McGuinness, the authors of the recipe book I devoted my first attempt of Brioche to -- Bourke Street Bakery.

Below is the exact recipe and instructions without any modifications. Please read my afterthoughts written below before attempting. =)
Brioche (makes a 22 x 7.5 x 7.5 cm loaf)

   190g     All-Purpose Flour, chilled
       4g     Fresh Yeast, chilled
     15g     Caster Sugar, chilled
    30ml    Milk, chilled
        3      Eggs, chilled
       5g     Salt
   125g     Butter, unsalted, softened, cut into 1.5cm cubes

Egg Wash = 1 Egg + 100ml of Milk + pinch of salt

Preheat oven to 220ºC
1. Grease and line the loaf tin.

2. Using a dough hook, mix all ingredients EXCEPT butter on Low speed for 3mins, then increase the speed to High and mix for another 3mins.

3. Reduce the speed to Medium and with the motor running, add a few pieces of butter at a time, making sure it is well incorporated before adding more -- when finished the dough should be smooth, soft and very sticky to the point of being difficult to handle.

4. Transfer the dough to a lightly greased bowl, cover with a clean tea towel. Place in the refrigerator to prove for about 1 hour.
5. On a lightly floured work surface, press the dough, gently knock out most of the air and pressing out to form a rectangle, about 2.5cm thick. Fold 1/3 of the dough onto itself and repeat with the remaining 1/3.

6. Turn the dough 90º and repeat the 1/3 folding. Place the dough back into the container with the folds underneath, again cover with tea towel and continue to bulk prove for another 1 hour.

7. On a lightly floured work surface, gently knock out the air again. Press the dough out into a rectangle and fold the 2 sides to your left and right into the centre. The dough should be as wide as the tin's length.

8. Press the dough down to form a rectangle and starting from the side furthest away from you,, roll the dough towards you to form a log.

9. Use the palm of your hand to close the seam running the length of the log. Place the dough into the tin, seam side down. Brush the top of the loaf with egg wash.
10. Reduce the oven temperature to 180ºC and bake the Brioche for about 40 mins, or until golden. When turned out of the tin, the base should sound hollow when tapped.

Thoughts: Although the authors had warn about the stickiness of their recipe, I did not expect it to be as wet and gooey as a thick cake batter. The dough will not pull away from the sides of the bowl. It will not become smooth no matter how long you mix/knead. And forget about membrane stage. It will remains pretty much as a big glob of sticky mess. I regret not researching enough before my attempt else I would have been aware that the Brioche dough is indeed this sticky, this wet and highly difficult to handle. There are other recipes out there with a lower egg/butter to flour ratio; although they will be easier to handle but the result might not be as fragrant as a higher butter ratio recipe.
Needless to say, I succumbed to temptation and added an additional 50g of AP flour, thinking that the difference in temperature, humidity or even the size of the eggs must have done something to the dough. Of course, I was wrong. Heehee.. Although my Brioche still smells heavenly with all the butter inside, the addition of AP flour yielded a drier and denser texture. To salvage my mistake, I turned the dry Brioche into French Toast for breakfast and it was a-m-a-z-i-n-g! Thankfully I don't have to feed Mr. Bin! =P

One thing to point out though, this recipe does not yield a sweet Brioche as the kind we are accustomed to. Please feel free to adjust the sugar as per desired. =) And although the recipe stated rest the dough in fridge for an hour, some articles suggest that it will be best to let it rest overnight so the flavours can develop. That was what I did, so this Brioche took about 15 hours to complete.
And the 2 odd looking pastry/bread thingy above? This is how brioche are shaped traditionally, and it's not placing a separate bit of dough on top of another, au contraire to what some bloggers say. Instead of using a "Brioche à tête" mould, I utilized a fluted egg tart mould which does the job just as well. I will definitely attempt this recipe again, bearing in mind that I should not add additional flour but till then, it will be back to cakes for me!


All blog posts and photos are properties of WhatToBakeToday (unless otherwise stated). Unauthorized use and/or duplication of these contents, whole or part thereof, without express or written permission from this blog's author is strictly prohibited. Excerpts and links may be used, provided that full and clear credit is given to WhatToBakeToday with appropriate and specific direction to the original content.