Bloody Eyeball Jellies (Halloween)

WARNING: This post contains some visuals that may be frightening to young children. View at your own discretion.

Since last week's play on shaping Matcha Sablés into fingers (and successfully creeping out a few friends XD), I having been thinking about transforming other desserts into Halloween worthy treats. I want them to look as "real" as possible or at least able to spook myself, if not what's the point right?

A friend from a baking forum suggested I should make eyeballs. Right. How can I miss them, they are the essentials of the Halloween spirit, isn't it?! In fact, I have been thinking about them for a long time and had wanted to attempt eyeballs before the sablés but I just didn't have any inspiration and couldn't conceptualize any ideas!! Had to put it on hold and focus on the fingers first.

I tried googling for Halloween eyeballs ideas; almost all of them are cookies recipes, with a few appetizers like deviled eggs around. Not that a cookie recipe isn't good enough for me, but I want the visual, the texture and the whole concept to be as close to reality (or my perceived reality for that matter) as I can get it to be.
Almost inevitably, the best medium (in my opinion) to use for this concept has to be jellies; the wobbly texture and the thin film of water on its surface resembles that of a real eyeball. I opt for Strawberry Coulis as the "blood" and made it slides off the sides of the eyeballs so it kinda resembles the flesh tissue inside of our eye sockets. This might not be very well done, but with the time constraint, I've put in my best effort for this creation!! Hopes everyone likes them. ^_^
Strawberry Coulis
   150g     Strawberries, washed and hulled
     50g     Water
     50g     Sugar

1. Place everything in a pot and simmer over low heat for about 15mins till the sauce thickens and the fruit pieces kinda lose their shapes.
2. Purée the mixture in a food processor and have it pass through a sieve. Use a fork or spoon to help push the mixture through. This is to remove the seeds and ensure that the coulis is smoooth~

And the coulis is done. Mine is a very simple version. There are other recipes which includes lemon juice, alcohol, whatever. You may add if you like or you can even increase the amount of sugar if you find the strawberries too sour (the ones we get in SG can get really sour at times).
Halloween Jelly Eyeballs
1 packet of Almond Jelly
1 packet of Guiling Grass Jelly
1 spherical ice-cube tray

1. Prepare the Guiling Grass Jelly as per instructions on the back of packaging.

2. Using a dropper or a spoon, carefully place a few drops in the ice-cube tray. Take note that they solidify quite fast. Place into chiller for it to set slightly.

3. Prepare the Almond Jelly as per instructions on the back of the box.
4. Check that the Guiling Grass Jelly is set. Use a toothpick and prick each "iris" a few times. Fill the ice-cube tray with the Almond Jelly carefully. It takes a little time to fill completely, just slow down and wait till the liquid does not subside any more.

5. Place in the chiller for 2-3 hours till set.
6. Remove the top lid gently to prevent breaking any jelly. You may trim off the excess while in the tray or I just drop them into a bowl of cold water and gently "wash" off the excess.
There you have your jelly eyeballs!! You can choose to plate them like I did. Place a splotch of Strawberry Coulis first before placing an eyeball in it. Then dribble some coulis over its sides and let them slides off. If time is of the essence and you have no time to make a Strawberry coulis, you can make these into a great eyeball cocktail drink by purchasing off the shelves Raspberry/Cranberry/Pomegranate juice or even Rose syrup. Simply pour the juices into a large serving bowl and plop in the eyeball jellies before your guests arrive. And you will have a bowl of eyeballs welcoming them!! Happy Halloween!! =)


All blog posts and photos are properties of WhatToBakeToday (unless otherwise stated). Unauthorized use and/or duplication of these contents, whole or part thereof, without express or written permission from this blog's author is strictly prohibited. Excerpts and links may be used, provided that full and clear credit is given to WhatToBakeToday with appropriate and specific direction to the original content. 

Green Witch Fingers (Halloween)

WARNING: This post contains visuals that may be frightening to young children. View at your own discretion.

You know what irks me recently? I have been to a number of blogs these days and they don't credit the source of recipe. I'm sorry but somehow, that irritated the hell outta me. I don't know why, maybe because I know how fist-clenching, teeth-grinding, hair-tearing it is to make a modified recipe work, let alone build one from scratch. To me, it is just basic courtesy but oh well, there will always be irritating people around. I know that was totally unrelated, just needed to get it off my chest! Maybe these people are green-eyed (or skin, rather) monsters, like these Halloween cookies I'm gonna share! However, I aspire for them to resemble the digits of a certain famous Witch.
You may use any cookie recipe you like, but I'm going to use a Matcha Sablés recipe.
Green Witch's Fingers
A batch of desired cookie dough (Again, I chose Matcha)
A handful of blanched whole Almonds
Red food colouring
Cake Tester or Toothpick

1. Depending how thin or fat you want your fingers to be, weigh out 20g - 30g of dough to work on. 

2. Roll the dough gently between your palms to get a rough oblong shape. Placed it on a lined baking sheet and mould into your desired finger shape.
3. When satisfied, gently press a blanched almond into 1 end of your "finger", the pointed side of almond facing outwards to mimic a fingernail. 
4. Use a cake tester or skewer to press out 3 lines on each "knuckles". To add to the gruesome effect, dip a toothpick into red food colouring and go through the wider side of the almond.
5. Bake the "fingers" according to recipe.

While shaping the fingers, take note that some cookie recipes will expand and spread slightly during baking. So you might have to make them smaller and thinner than how you actually want them to be. But if they do turn out bigger what you wanted, just name them "Fat Ogre's Fingers" instead. A little browning is ok as it makes the fingers look more authentic, however take care not to brown them too much else they will lose their icky yucky green colour.
To the many friends and family who were totally gross out by my "fingers", I'm really sorry!! >.< It's all in the good fun of the holiday season. No fun if it doesn't strike fear in you for Halloween!


All blog posts and photos are properties of WhatToBakeToday (unless otherwise stated). Unauthorized use and/or duplication of these contents, whole or part thereof, without express or written permission from this blog's author is strictly prohibited. Excerpts and links may be used, provided that full and clear credit is given to WhatToBakeToday with appropriate and specific direction to the original content. 

Basic Chocolate Sponge

There is absolutely no doubt that food has to look decently delicious in order to sell or prompt someone to eat it. With all due respect to bakers/cooks/patisserie chefs and their beautiful creations, I sincerely think it is most important that the food tastes equally good. There have been too many times when I was lured into buying beautifully crafted food, only to realize their taste doesn't match up. 

This is especially important in current times where more emphasis is placed on how exceptional the cake looks rather than how it taste. There have been so many "instagram-worthy" cakes at countless (birthday) parties where the taste falls short and misses the mark by so much. 

As the proverb goes, "learn to walk before you run". I've always believed in the importance of getting the basics right and building a strong foundation. Here's the recipe to one of my solid foundation that I always turn to. 
Basic Chocolate Sponge (makes 8" Round)

Mixture A
     5       Egg Yolks
   65g     Castor Sugar

Mixture B

   40g     Milk
   70g     Corn Oil
  2.5g     Vanilla Extract
     2g     Instant Coffee Granules

Mixture C
   80g     Top Flour
   12g     Corn Flour
   30g     Cocoa Powder
     5g     Baking Powder
Optional
   *a pinch of Cinnamon Powder*

Mixture D
     5       Egg Whites, room temperature
 110g     Castor Sugar

Preheat oven to 160ºC 

1. Grease and line the cake tin.

2. Stir (B) till homogeneous, reserve. Sift (C) and reserve.

3. Using a whisk attachment, whisk (A) till colour is pale and volume has doubled.

4. Reduce the speed of mixer and slowly add in Mixture (B) till combine. Add in Mixture (C) and whisk till batter is thick, smooth and lump-free. Transfer batter to another bowl, wash and clean mixer thoroughly.

5. Using the whisk attachment, start whisking the Egg Whites till before soft peaks and gradually add in the Sugar. Stop whisking when meringue turns glossy and just reaches stiff peaks.

6. Gently stir in 1/3 of the meringue into the batter to lighten the mixture. Gently fold in the remaining meringue with a spatula or your hand (recommended) till no white spots can be seen.
7. Pour into prepared tin. For round tins, bake 40-45mins or until a cake tester comes out clean. For rectangle/square tin, bake 30-35mins.

8. Cool completely before frosting or slicing.

This rich, soft chocolate sponge "building blocks" tastes great on its own, even without any cream, mousse, ganache or whatsoever. They also make a great teatime snack with a cuppa tea/coffee/milo! Make some soon and you'll understand why I love it so much.


All blog posts and photos are properties of WhatToBakeToday (unless otherwise stated). Unauthorized use and/or duplication of these contents, whole or part thereof, without express or written permission from this blog's author is strictly prohibited. Excerpts and links may be used, provided that full and clear credit is given to WhatToBakeToday with appropriate and specific direction to the original content. 

How to line a Rectangle/Square Tin

Just thought that since I did a post on how to line a Round Cake Tin sometime ago, I should do a follow-up post on lining a Rectangle/Square tin. There are, of course, many ways to go about lining a rectangular/square tin, this is the simplest way I like to do it. =)

1. Cut out a piece of parchment paper slightly bigger than the tin you are trying to line.
2. Make a cut into the 4 corners of the paper like in the above picture. 
3. Place the parchment paper into the tin, overlap the "triangles" at the corners and there it's done. Grease tin if required.

This method is not only fuss-free and easy, because of the neatly tucked corners, my bakes are winkle-free which can be a resultant of crinkled corners. =)


All blog posts and photos are properties of WhatToBakeToday (unless otherwise stated). Unauthorized use and/or duplication of these contents, whole or part thereof, without express or written permission from this blog's author is strictly prohibited. Excerpts and links may be used, provided that full and clear credit is given to WhatToBakeToday with appropriate and specific direction to the original content. 

Hidden Heart Cupcakes (Valentine's Day)

The craze these days is all about pretty little cupcakes. I'm more accustomed to making rustic stuffs so when it comes to decorating or making pretty things, I'm still an amateur. Albeit slightly time consuming, this concept is perfect for me as no elaborate piping skills are needed yet they still have a "wow" effect for guests and is very suitable for occasions like Valentine's Day, weddings and birthdays! Yeah!
Although I've used "Maple Bacon Cupcakes" recipe for this particular application, you can use any other desired flavour or combination you like. Not many people are huge fans of sweet and savoury combinations. =P However, regardless which sponge cake and cupcake recipe are used, the flavours should compliment each other and contrasting colours will look nicer when cut.

Hidden Heart Cupcakes
  1 Sponge Cake, about 1" height
  1 Cupcake recipe

1. Prepare a basic sponge cake as per usual, but baked in a square or rectangular baking sheet. Let cool completely.

2. "Punch" out desired shapes from the sponge cake and reserve. The remaining scraps can be eaten. =D *yums* If preparing on different days, cling wrap the cut out shapes and keep in refrigerator.

3. Prepare your desired cupcake recipe as per usual right until before scooping them into the cupcake liners.

4. Make little markings on the OUTSIDE of the cupcake liners. This will indicate where to cut exactly to get a cross sectional view of the hidden shapes.

5. Fill 1/4 of the cupcake liners with cake batter, shake the tray slightly so the base of the liner is covered entirely.

6. Align the cut out shapes with the markings and place them carefully into the batter.

7. Fill up the liners with remaining batter till 3/4 of the way. Be extra careful not to tilt the cut out shapes.

8. Bake according to the recipe's temperature and timing. Test the area surrounding the cut out shapes for doneness.


9. Let cool completely, frost and decorate as per usual.
10. Cut up one of them where your marking is and show your guests the little surprise you put inside!


All blog posts and photos are properties of WhatToBakeToday (unless otherwise stated). Unauthorized use and/or duplication of these contents, whole or part thereof, without express or written permission from this blog's author is strictly prohibited. Excerpts and links may be used, provided that full and clear credit is given to WhatToBakeToday with appropriate and specific direction to the original content. 

Yuzu Chiffon Cake

Riding onto the Pandan Chiffon post yesterday, let me share the Yuzu Chiffon recipe I modified from Richard Goh's Pandan Chiffon recipe. I've tried making this flavour once with ieatishootipost's recipe but I overestimated the heaviness of the yuzu paste and ended up adding too much liquid to the whole batter, resulting in a overly wet and clumpy interior.

Great taste, but super bad texture that's beyond rescue. This time, in order to prevent me throwing away a whole 10" cake (it's 9 eggs!!), I decided to modify from my baking teacher's Pandan Chiffon recipe. There are only a few slight changes and the instructions remain pretty much the same.
Yuzu Chiffon Cake (makes 21cm tube tin)
(Modified from Mr. Richard Goh's Pandan Chiffon recipe)

Mixture A
     5       Egg Yolks
   80g     Castor Sugar

Mixture B

   50g     Corn Oil
   40g     Yuzu Tea Jam/Paste
~100g    Yuzu Juice and/or Milk (may require more)
Optional
A drop of Yellow food colouring
  • You may choose between Yuzu Juice or Milk or a combination of both, depending on how "strong" you want the yuzu taste to be.
Mixture C
   75g     Plain Flour (I used Top Flour)
   35g     Corn Flour
     3g     Baking Powder

Mixture D
     5       Egg Whites, room temperature
   70g     Castor Sugar
1/8tsp    Cream of Tartar

Preheat oven to 170ºC (Original 180ºC, I find that the top browns too fast)
1. Dissolve the Yuzu Tea Jam/Paste into the Yuzu Juice/Milk and top up the mixture to 120g if not sufficient. If your jam/paste has got yuzu zest, whizz them in a food processor along with the Yuzu juice/milk and top up the mixture to 120g. Then combine this yuzu mixture with the corn oil till homogeneous.

2. Sift Mixture (C), twice if you want, and reserve.

3. Using a whisk attachment, whisk together Mixture (A) till the colour is pale and the volume has doubled.

4. Reduce the speed of mixer and slowly add in Mixture (B) till combine. Add in Mixture (C) and whisk till batter is thick, smooth and lump-free. Transfer batter to another bowl, wash and clean mixer thoroughly.

5. Using the whisk attachment, start whisking the Egg Whites till foamy before adding Cream of Tartar then gradually add in the Sugar. Stop whisking when meringue turns glossy and just reaches stiff peaks.

6. Gently stir in 1/3 of the meringue into the batter to lighten the mixture. Gently fold in the remaining meringue with a spatula or your hand (recommended) till no white spots can be seen.

7. Sharply rap the bowl against the countertop a couple of times to release trapped bubbles before pouring into the tube (aka chiffon) tin.
8. Place the cake at the lowest possible rack and bake at 45-55mins till cake tester/skewer comes out clean. (My top browns too fast. So I turned down the temperature to 150ºC at about 30mins into baking and covered the top with aluminium sheet)
9. Immediately turn the tin over and elevate it using a bottle/funnel (I use a funnel on a wired rack) and let cool completely.
10. When completely cooled, insert a sharp knife and go around the sides to release the cake. Try to use one swift movement and keep the blade as close to the tin as you can. Repeat the same for the bottom of the cake. Voila, you're done!
Although Yuzu falls within the same citrus family as Lemon, its fragrance and tanginess is not as sharp as that of a lemon. Not saying that lemons are not good for bakes but personally, I find Yuzu's flavour profile more suitable for delicate bakes such as chiffon whereas lemon's sharpness cuts through sweetness and creaminess better.


All blog posts and photos are properties of WhatToBakeToday (unless otherwise stated). Unauthorized use and/or duplication of these contents, whole or part thereof, without express or written permission from this blog's author is strictly prohibited. Excerpts and links may be used, provided that full and clear credit is given to WhatToBakeToday with appropriate and specific direction to the original content. 

Pandan Chiffon Cake

Mid-autumn festival has just passed, hope everyone had fun eating (snowskin) mooncakes, pomelo, (water) caltrops, yams and sipping tea, playing (burning? lol) with lanterns/candles, all while admiring the beautiful moon. For those who tried the snowskin mooncake recipe I posted some 2 weeks ago, hope you guys enjoyed making them as much as I did!

While I was busy making mooncakes the past 2 weeks, I realized I haven't do a post on the well-loved and very much sought after - Pandan Chiffon cake. Now that my blogging has resumed, of course it will be the first post I'm going to write on!!

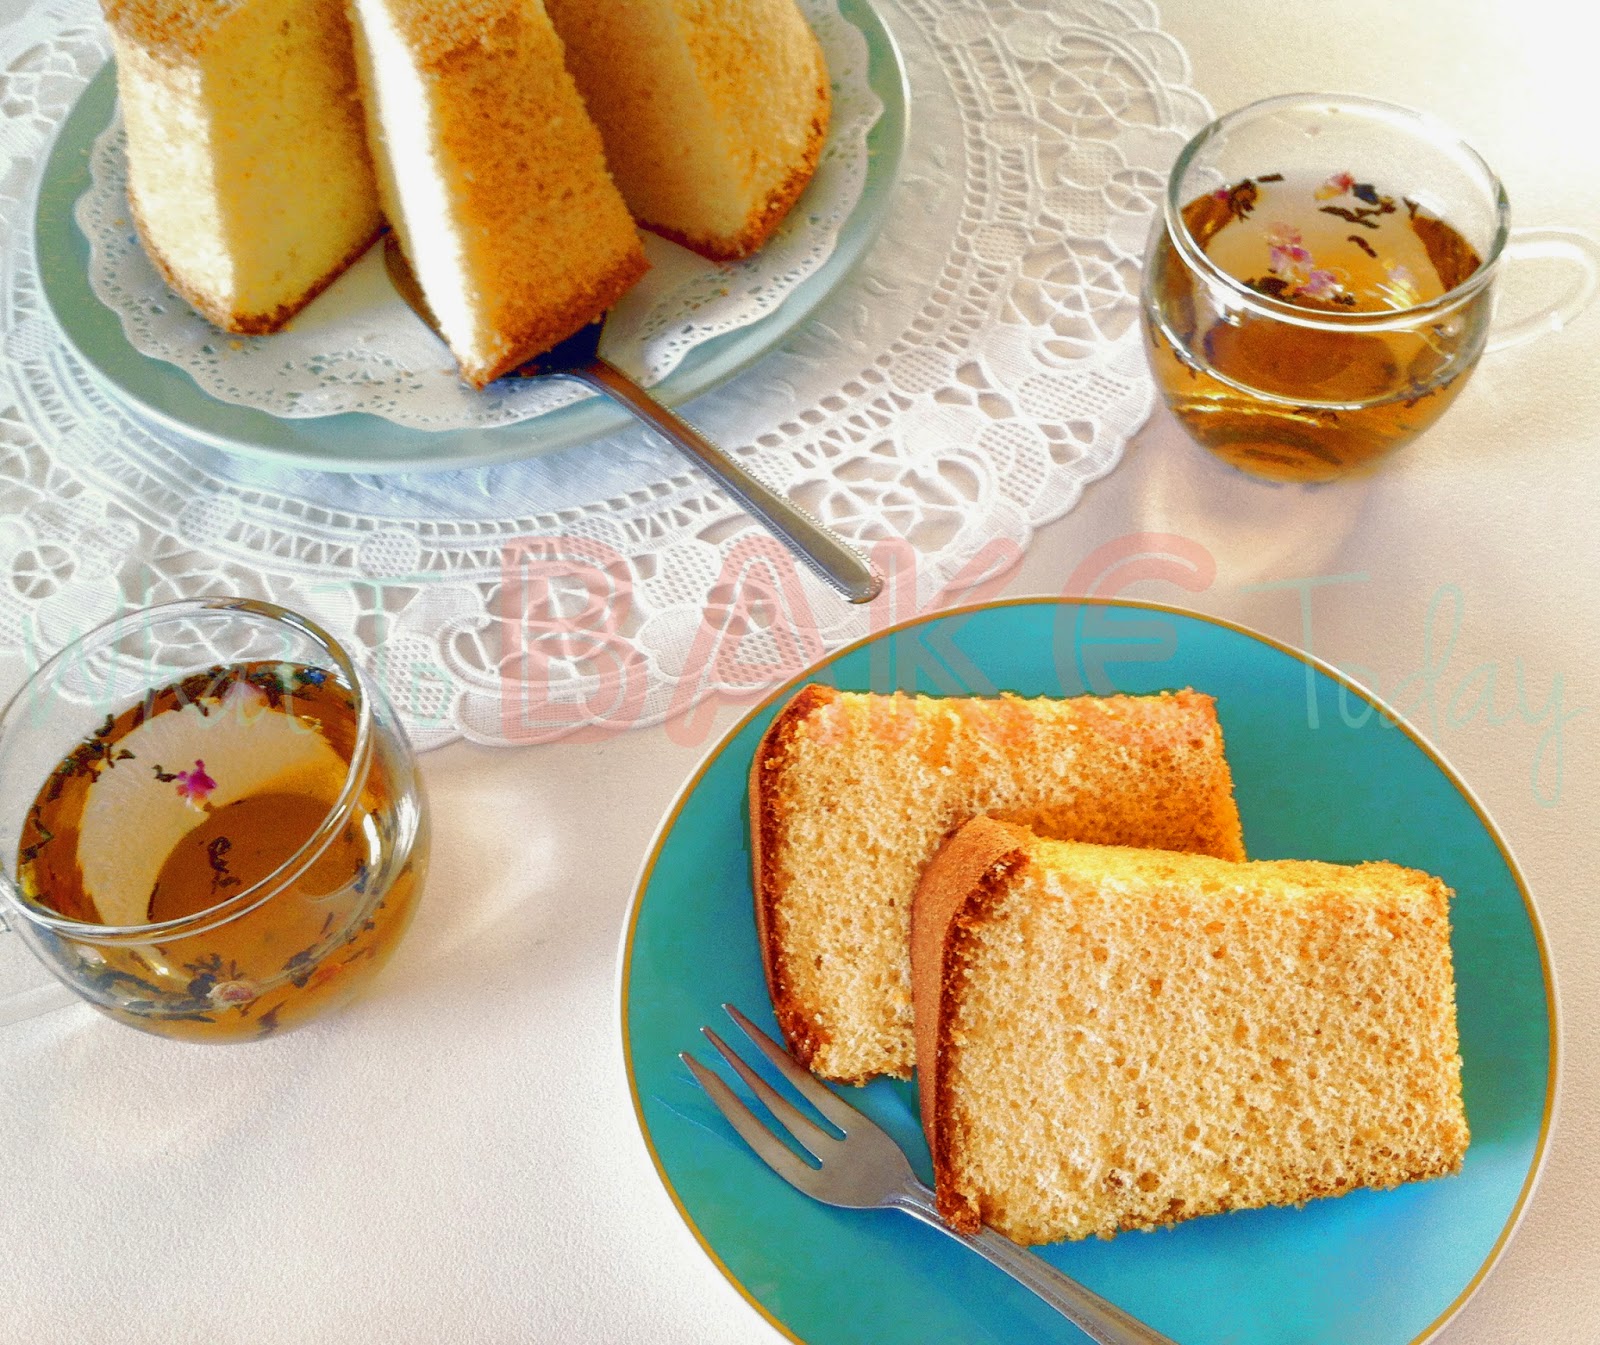
When growing up, I especially love having a slice of Pandan Chiffon cake as mid-morning snack that I bought from the canteen during recess time or as a late afternoon snack after coming back from school. Always so perfect when washing it down with a cup of hot Milo. *yums* It's little wonder how my Mum fed me until this size! XP

Back in the 1980s, the craze in the baking scene was all about the soft, bouncy Pandan Chiffon cake. It was considered the queen of all cakes which requires precise skills and all elements to be in place just to get the right amount of springiness (and "Pandan-ness") in the Pandan Chiffon cake.
So when I first embarked on my baking adventure, I envisioned myself to be able to make Pandan Chiffon in a matter of a year. Boy, I was wrong. I did not muster enough courage to even attempt it until 5 years later and yet didn't manage to get it right until the 2nd attempt. Even choosing the recipe took me a week of research, asking friends, relatives, veterans and of course, the good ole internet. In the end, with a confidence boost from chemistry? physics?, I chose KiamNianWong's recipe as featured on ieatishootipost which stands tall and proud yet remain soft and springy with the assistance from extra egg whites.

Pandan Chiffon Cake (makes 10" tube tin)
(Recipe by KiamNianWong from ieatishootipost)
Mixture A
     6       Egg Yolks
 100g     Castor Sugar (I reduced to 80g)

Mixture B
 115g     Corn Oil
 140g     Coconut Milk
   30g     Pandan Juice
  8.5g     Vanilla Extract
     4g     Pandan Extract/Paste
Optional
A drop of Green food colouring

Mixture C
 200g     Cake Flour (I used Top Flour)
     9g     Baking Powder
  1.5g     Salt

Mixture D
     9       Egg Whites, room temperature
 100g     Castor Sugar
     3g     Cream of Tartar

Preheat oven to 170ºC
1. Whisk to combine Mixture (B) and reserve. Sift Mixture (C) twice and reserve.

2. Using a whisk attachment, whisk together Mixture (A) until the colour is pale and the volume has doubled.

3. Reduce the speed of mixer and slowly add in Mixture (B) till combine. Add in Mixture (C) and whisk till batter is thick, smooth and lump-free. Transfer batter to another bowl, wash and clean mixer thoroughly.

4. Using the whisk attachment, start whisking the Egg Whites till foamy before adding Cream of Tartar then gradually add in the Sugar. Stop whisking when meringue turns glossy and just reaches stiff peaks.

5. Gently stir in 1/3 of the meringue into the batter to lighten the mixture. Here, you may choose to fold in the remaining meringue using your hand (recommended), it will be easier to control and better to "feel" the mixture with. Or you may choose to fold in gently using a spatula. I started with spatula first but later realized that my MiL's (and also from my baking teacher) advice of using hand really works better.

6. Sharply rap the bowl against the countertop a couple of times to release trapped bubbles before pouring into the tube (aka chiffon) tin. Dr. Leslie Tay advised not to turn the tin while pouring, it didn't make a big difference for my case.

7. Put the batter at the lowest possible rack and bake at 20-25 mins till the top is browned and just about to crack. If the top is too browned, place a baking sheet or a piece of aluminum foil on the upper rack. Lower the temperature to 150ºC and continue baking for another 30-35 mins till the cake is done. Cake tester/skewer should come out clean.

8. Immediately turn the tin over and elevate it using a bottle/funnel (I use a funnel on a wired rack) and let cool completely.
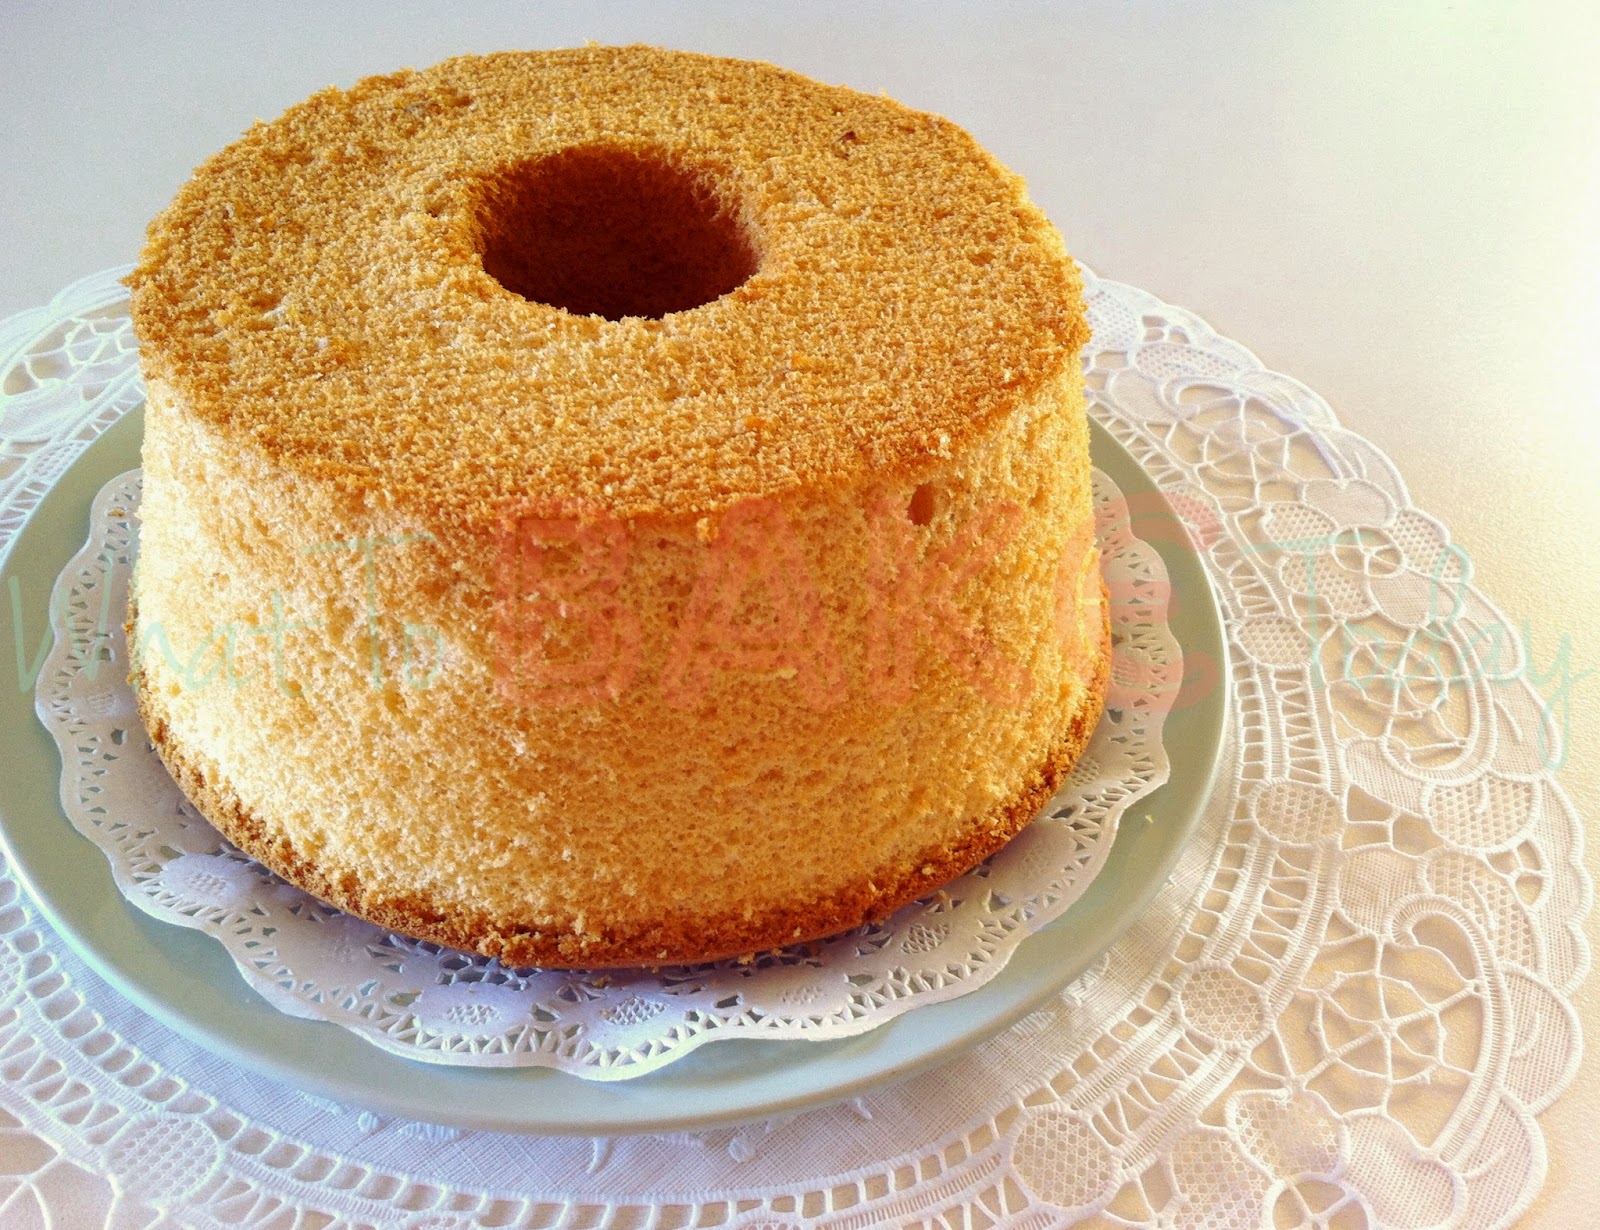
9. When completely cooled, insert a sharp knife and go around the sides to release the cake. Try to use one swift movement and keep the blade as close to the tin as you can. Repeat the same for the bottom of the cake. Voila, you're done!
There are seemingly a lot of details to take note of but with practice, the process will be more fluent and you'll realize it's not too difficult afterall. Furthermore, this is an "extra white" recipe, it will give the cake an extra push in height and softness. However, my first cake did not "huat" completely, leaving a dark green ring around the bottom of the cake and there's a deep faultline around the face of the cake (see picture). =( Thankfully, I tasted success on my 2nd attempt and my family has been enjoying homemade Pandan Chiffon since. Below are some pointers to take note of and hopefully can be of help. ^_^
Common troubleshoot
  • Be careful not to overbeat the yolks else the top will crack when baking
  • Be careful not to overbeat the whites. It will be difficult to incorporate into the batter and may leave huge bubbles/tunnels inside the cake and taint the cake white.
  • Be careful not to overfold the whites else it will deflate, resulting in a dense texture
  • Place the cake on the lowest possible rack when baking so it will be closer to the bottom heating element, letting the cake rise beautifully and a nice golden brown on the bottom (or top after you overturn)
  • Advice from baking teacher: It is better to slightly overbake chiffon than to underbake else the interior will be wet and sticky.
  • Do not grease the tin as the cake need to "climb" the sides to rise and also the cake will drop when we overturn the tin after baking
  • Remember to overturn the tin after baking else the cake will sink
That's about all I can think of now. If anyone encounters any other problems, let me know and I'll be glad if I can help answer! Most importantly is not to give up!


All blog posts and photos are properties of WhatToBakeToday (unless otherwise stated). Unauthorized use and/or duplication of these contents, whole or part thereof, without express or written permission from this blog's author is strictly prohibited. Excerpts and links may be used, provided that full and clear credit is given to WhatToBakeToday with appropriate and specific direction to the original content.