Crunchy Chocolate Spiders (Halloween)

I've went a little crazy this year. There are too many things on my "to-bake" list. With family visiting earlier in the month and 2 days away from Halloween, it's a mad rush! Too ambitious I say, but I'll try. Halloween is the most interesting celebration in my opinion, I get to create some gruesome looking food (hopefully) to disgust family and friends.

When I first saw the idea on earthydelightsblog, I knew I can't pass on it. Chocolate, peanut butter and pretzels?! Yums! Sweet and savoury, my favorite combination. I did think the recipe sounds too teeth-decaying sweet, and the spiders look so cute! So here's my rendition.
Crunchy Chocolate Peanut Butter Pretzel Spiders (makes 6 x 10cm dia spiders)

For body
100g     Dark chocolate
  50g     Peanut butter, crunchy or smooth
  50g     Pretzels, roughly chopped
Pinch of salt

For legs
    20     Pretzel twists, for the spiders' legs
  75g     Dark chocolate
1. With a sharp knife, cut the curved sides of the pretzel twists. Cut more than what is needed, so there's a good selection of shapes and sizes. Also in case of breakage along the way.

2. Melt dark chocolate, peanut butter and a pinch of salt over bain marie (or microwave it in short bursts). Stir to combine till mixture is smooth and lump-free.

3. Mix in the chopped pretzels, coating as even as possible.

4. Line a baking sheet with parchment paper. With 2 spoons, shape rounded mounds and drop them onto the lined baking sheet. They don't have to be perfect, as long as the shape is there. Chill slightly till set.
5. Melt the 75g dark chocolate in bain marie or microwave. Dip the curved pretzels into melted chocolate and stick it onto the spider's body. Keep the melted chocolate warm by setting it in a bowl of hot water while working. Chill the spiders again to set the legs.

6. When the legs are set, continue coating the rest of the legs in melted chocolate. Chill to set again and they're ready to serve. 
Thoughts and Tips: I'm lazy to add eyes onto the spiders, but I think they look pretty good as they are. You may add silver sugar balls as earthydelightsblog did for the eyes. Sure they'll look even better. 

When sticking the legs, I did it in 2 steps instead of 1 -- sticking them on with chocolate, making sure they have set before coating the whole thing in more chocolate. I was apprehensive that I'll have a hard time positioning the legs if I coat the whole thing altogether. Probably end up making a big mess! You may choose to dip the whole leg and stick it onto the body to save a little time, but I wouldn't take the risk.
This recipe will yield more spiders if you make them smaller. You will then have to "trim" the pretzels curves shorter to fit the body, so they appear proportionate. A lot more legs, a lot more work but they'll be bite sized for your guests. And because it's chocolate peanut butter covered pretzels (so sinfully good), I suggest you prepare a whole army of spiders! *belches* The good thing is that since all the ingredients have long shelf life, you can prepare a mega huge batch of these creepy crawlies in advanced, and they will freeze well for a month or more! They will also serve as a great "emergency dessert" when you have unexpected guests, just thaw them slightly before serving. 

I thought the finished spiders resemble a hairless tarantula, albeit an ugly and uneven one. But my sister thought they look like dung-covered spiders. Eww.... oh wait, even better, that will amp up the gross factor. "Dung-covered Spiders" they are then!


All blog posts and photos are properties of WhatToBakeToday (unless otherwise stated). Unauthorized use and/or duplication of these contents, whole or part thereof, without express or written permission from this blog's author is strictly prohibited. Excerpts and links may be used, provided that full and clear credit is given to WhatToBakeToday with appropriate and specific direction to the original content. 

Realistic Looking Eyeballs Dessert (Halloween)

WARNING: This post contains some visuals that may be frightening to young children. View at your own discretion.

Huge apology for writing this post so close to Halloween! I've had it prepared in the beginning of the month but family came over for a week, so I didn't have the time to pen it down. Thankfully, as difficult as these look, they are actually very simple to make plus the ingredients are readily available. There should still be time to prepare this awesome looking dessert for your Halloween party!
Glutinous Eyeballs Dessert Soup (serves 4)

Glutinous dough
100g     Glutinous rice flour
  75g     Warm water, about 40°C
Cocoa powder

Red Dates with Ginger dessert soup
1.5L     Water
  70g     Yellow rock sugar (adjust more or less to taste)
 8-10     Red dates
A piece of Ginger, about 2"x1" size, skin removed, sliced
8 pieces of Pandan Leaves

Optional
Few drops of red food coloring
Water
A small food paintbrush

1. Pour 3/4 of the warm water into the glutinous rice flour and mix to combine. Drizzle in the remaining water to form a dough that no longer sticks to the sides of bowl. You may require more or less water. If dough is too wet, add a little more glutinous rice flour. Cling wrap the dough or cover it with a damp, clean cloth. Rest for about 15 mins.
2. Pinch out a small portion of the dough and mix with cocoa powder. You will need to add more water as cocoa powder is hygroscopic too. Stop when the consistency feels the same as the white dough. Cling wrap and rest for about 15 mins.

3. Divide the white dough into small balls, and the black dough into an even smaller size. Flatten the black balls and stick to the white balls with a touch of water. Roll the combined dough gently between your palms to get a more cohesive surface. Cover the finished eyeballs with cling wrap while you work with the remaining. You can freeze the eyeballs by dusting a thin layer of corn flour to prevent sticking, and store them in a freezer-safe bag. Thaw completely before cooking.
Optional
4. Dilute the red food coloring with a little water, and carefully paint the opposite end of the "pupil" (black dough) in streaks to mimic blood vessels.

5. Bring a pot of water to boil (not the sweet soup), then turn it down to a simmer. Prepare an ice bath next to your pot. Gently drop the eyeballs into the simmering water, give it a gentle stir to prevent them from sticking to the pot.

6. Give them another minute or so after they float to the surface. Scoop them into the ice bath immediately and reserve.

7. Bring all ingredients for sweet soup to a boil, then turn the heat down and simmer for 30 minutes, stirring occasionally to dissolve the rock sugar. When done, discard the red dates, pandan leaves and ginger. Alternatively, if you prefer a stronger taste, leave them in the soup until just before serving.

Assembly
8. Simply place eyeballs into the serving vessel, and top with sweet soup. May be served both warm or chilled.

Thoughts: I was actually looking at the 九份芋圓 while randomly surfing for Halloween inspiration. It suddenly hit me that the dough's consistency is like fondant and I can shape it into eyeballs! A happy coincident! Since I didn't have sweet potato flour, I decided to try with the traditional 汤圆 (Asian sweet dumpling) recipe. So thrilled that the resulting eyeballs looked amazing. By amazing, I mean they managed to gross out my family and friends. Heehee.. They look pretty realistic as it is, but I guess I could have done a better job for the "pupils", maybe add in "iris" next time.

Some tips for shaping the eyeballs. The human eyeballs are not perfectly round, in fact they are slightly flatter in the front and the back, resulting in a slight oval shape. I pinched some of them too hard while painting, and they had elongated backs. Still visually stunning but not anatomically correct. *opps* 
I listed the painting as optional because I realized (with help from family and friends of course >.<) the "blood vessels" was mainly why the eyeballs look gruesome and may not be suitable for kids. However, they also agree that without the vessels, they look nothing like eyeballs. Sooo... I'll leave the option open for you guys to decide. 
Since this is a 汤圆 dough, they tastes just like one with a subtle chocolate flavor. I chose to serve them in recycled canning jars, so they looked like preserved eyeball specimens in a medical facility. It'll go along great with a mad scientist or surgeon themed Halloween party!


All blog posts and photos are properties of WhatToBakeToday (unless otherwise stated). Unauthorized use and/or duplication of these contents, whole or part thereof, without express or written permission from this blog's author is strictly prohibited. Excerpts and links may be used, provided that full and clear credit is given to WhatToBakeToday with appropriate and specific direction to the original content. 

Bread Monster (Halloween)

The Green Witch's Fingers and Bloody Eyeballs Jellies, which I've put together 2 years ago, received wild reviews, mostly for them being disgusting. They were a lot of fun from conceptualization to materialization, but regrettably, I wasn't able to create any last year.

So this year, you'll be sure I'll rack my brains for something. Before I go on with the disgusting food, let's kick start the party with some bread! These "supposedly-creepy" crawlies, tadpoles look alikes with their pudgy limbs and perpetually sticking out tongues, they will be the cutest Halloween party food ever!
Bread Monsters (Halloween)

A batch of bread dough
Hot dogs, sliced into half at an angle
Cream horn tubes
Few red beans
Small pieces of cheese

1. Prepare bread dough as per recipe. Divide dough into 60-75g depending on how big your tubes are.

2. Lightly oil the tube and wipe off the excess with a kitchen towel. Roll out dough into a long strip. Starting with the pointed end, roll the dough around the tube, pinch to close.

3. Roll out small pieces of dough as eyes and limbs. Attach them to the 'body' by applying a little water.

4. Let proof and bake accordingly to your recipe. You may bake the hot dogs at the same time but keep an eye on them, don't let them burn.

5. Have the cheese and red beans ready the moment the breads come out of the oven. Stick the cheese onto the 'eyes' while it is still hot, followed by the red beans. Let cool slightly.

6. Remove the cream horn tube when cool enough to handle. Stick in the hot dog and you'll have a little bread monster looking right back at you!


All blog posts and photos are properties of WhatToBakeToday (unless otherwise stated). Unauthorized use and/or duplication of these contents, whole or part thereof, without express or written permission from this blog's author is strictly prohibited. Excerpts and links may be used, provided that full and clear credit is given to WhatToBakeToday with appropriate and specific direction to the original content. 

30 Minutes Bread Rolls

Like the 1 Ingredient Ice Cream, this is yet another recipe that sounded too good to be true. Freshly baked bread in 30 minutes (ok.. actually 35 minutes according to the author, but she thought 30 mins sounds better)?! After learning a lesson from the ice cream, I know I'll have to try first before dismissing it again.
30 Minutes Bread rolls (makes 12)
(recipe from Real Mom Kitchen)

270g     Water, warm
  80g     Oil
2 tbsp   Yeast, active dry
  50g     Sugar

    3g     Salt
     1      Egg
450g     Flour (either bread or all-purpose)

Preheat oven to 200°C

1. In the bowl of your stand mixer, combine warm water, oil, yeast and sugar. Let rest for 15 minutes.

2. Using a dough hook attachment, mix in the salt, egg and flour until dough no longer sticks to the sides.

3. Shape dough into desired sizes and shapes. Let rest for 10 minutes.

4. Bake for 10 - 13 minutes or until tops are just golden brown.
Thoughts: This is amazing! I have never tasted success in making sweet bread before, let alone one in such short time! I even tried rolling hot dogs, wrapping chicken curry filling, and it tastes just like those sold in the neighborhood bakeries! When you're in a place that sells the "normal" hotdog bun you grew up on, for A$3 instead of S$1.50, this is a God sent recipe!
The dough is quite sticky, so I'll advise oiling hands liberally before handing the dough. Adding a little flour will be acceptable, but too much will probably render it heavy and dry, be careful there.

Another noteworthy point is that the warm water used to activate the yeast should be between 41°C - 50°C. Anything beyond 55°C will kill the yeast, hence the dough will not rise. On the other hand, if the water temperature is anything less than 38°C, an amino acid called glutathione leaks from the cell walls, making the dough sticky and hard to handle.

The whole process actually took longer than the stipulated 30 mins. Like she mentioned, it is supposed to be 35 mins, but she didn't take into account the mixing and shaping of the dough. The mixing took about 5 mins, shaping another 5. So even though the "alot-more-than-usual" yeast provides an ultra extra boost in leavening the dough, the whole thing from start to end will take about 45 mins. No matter, it is still amazing to have freshly baked bread in under one hour!


All blog posts and photos are properties of WhatToBakeToday (unless otherwise stated). Unauthorized use and/or duplication of these contents, whole or part thereof, without express or written permission from this blog's author is strictly prohibited. Excerpts and links may be used, provided that full and clear credit is given to WhatToBakeToday with appropriate and specific direction to the original content. 

1 Ingredient Ice Cream

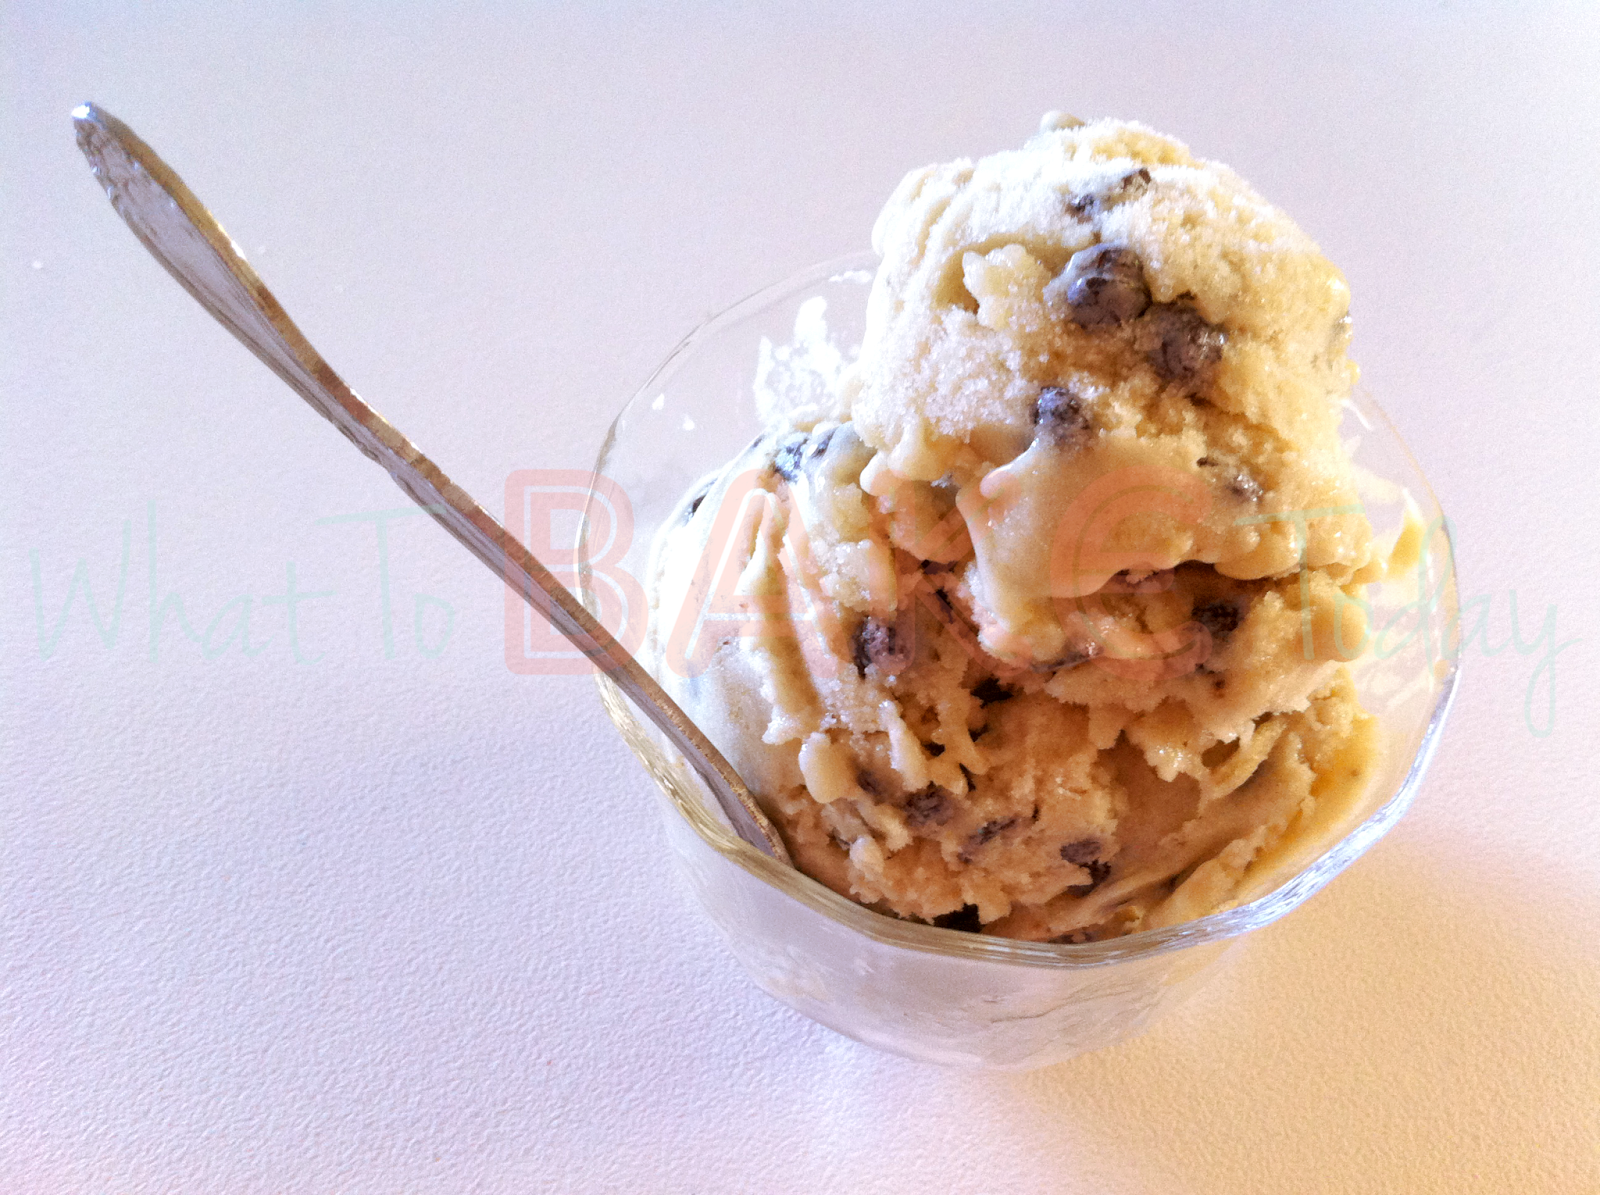
Some of you may have already seen this recipe going around for some time. Perhaps a handful of you might have even tried it yourself. When I first saw this recipe last year, I thought: "This must be a hoax (forgive me, but internet hoax is ubiquitous)! Creamy ice cream from just B-A-N-A-N-A-S?! Where will the fat come from? If only it is that easy", and proceed to hitting the "X" button, regarding it as one of the internet myths that's not uncommon at all.

In preparation for last week's Tokyo Banana, I made a mad dash for bananas and grabbed the "2 bunch for A$5" bag because I don't know how much nana I'm gonna need, also don't know how much Tokyo Banana I'm gonna make before I get sick of eating it. With little suprise, you know I ended with a lot of leftover bananas (1 bunch has about 6-8 fingers). So it was back to the drawing board, umm.. laptop I mean. Wasn't before long when I stumbled upon "1 Ingredient Banana Ice Cream" again, heck I should give it a go since I have so many bananas, doesn't matter if it fails!

Then this happened. Creamy Banana Ice Cream.
This is voodoo. I froze (the remaining bananas) on the spot.

1 Ingredient Ice Cream (makes about 1 cup)
(recipe from the kitchn)

1 large ripe banana, about 130g
1. Peel and cut banana into smaller pieces, shapes and size doesn't matter

2. Freeze them rock solid for at least 2 hours or ideally, overnight

3. In a food processor, start blending the frozen banana pieces by giving it a few quick pulses first. It'll be loud, the bananas will look impossible to blend, the food processor might even look like it's gonna fall apart, but CONTINUE blending!

4. Scrape down the banana mixture and continue blending.

5. Continue blending I say.
6. A few more whizzes. Then suddenly, almost magically. you'll have smooth & creamy banana soft serve! Absolutely delicious to dig in right away. This will also be the time to mix in anything you desire (I added some chocolate chips!). Alternatively, you may transfer the mixture to an airtight container and freeze till solid before serving.
Thoughts: While this is not the most authentic ice cream in "traditional" sense,  there's no reason why anyone would dislike this banana ice cream. Well, unless you hate bananas to start with, of course. But that can be easily fixed by mixing in a dollop of Nutella or a big spoonful of Peanut Butter! the kitchn has suggested a few common mix-in ingredients like the chocolate chips that I've added, honey, cocoa powder, nuts and spices. But what I think will absolutely rock my palate will be Strawberries and Banana ice cream! Not only will it be delicious, it will "remain healthy". *wink wink* Try some, and tell me which is your favorite mix-ins!


All blog posts and photos are properties of WhatToBakeToday (unless otherwise stated). Unauthorized use and/or duplication of these contents, whole or part thereof, without express or written permission from this blog's author is strictly prohibited. Excerpts and links may be used, provided that full and clear credit is given to WhatToBakeToday with appropriate and specific direction to the original content. 

Tokyo Banana

Japanese food has the power to make me go gaga. While I don't get to go Japan as often as I would like, I'm fortunate to have lots of friends and family who does. And every time someone travels to Japan, our family will raid the omiyage and snatch these twinkies look-alike confectioneries - Tokyo Banana!
Luscious, banana-flavored crème pâtissière, encased in a moist vanilla sponge, that ooze out with every bite. What's not to love? Like all Japanese snacks, these delights don't come cheap. A box of 16 goes for ¥2,057 (US$18.80, S$23.50, A$21.50)! But if you just want to onomnom and forgo the box, it will be slightly cheaper if you get the 4s pack. Yet another problem presents itself -- there can be never quite enough no matter how much you (or the traveller) lug home!
You can only imagine my joy when I stumble upon the recipe for it; it went straight to the top of my "To-Bake" list and bananas became top priority of my grocery list! 

Tokyo Banana (makes 8)
Sponge cake (makes 9" square)
     2      Eggs
  50g     Superfine Sugar (Caster sugar)
  35g     Cake Flour
  20g     Milk

Preheat oven to 180ºC

1. Beat 2 eggs and 50g of superfine sugar. Place over hot water, continue beating to melt the sugar and warm mixture till 40°C.

2. Remove from heat. With an electric beater, beat on high speed for 5mins, then on low speed for 2mins "to set".

3. Sift in 35g of cake flour, fold together with a spatula for about 10 times. Add 20g of milk, fold together with spatula for about 50 times until combined.

4. Pour batter into pan, drop pan against countertop to release trapped bubbles. Bake for 11-12mins

5. Drop the pan lightly to prevent shrinking. Let cool completely on wired rack.

Banana Custard Cream 
 100g     Banana, mashed
     1       Egg
  7.5g     Corn Starch
37.5g     Sugar
 150g     Milk
Optional
  2-3      drops of Vanilla Extract

1. Mix together all ingredients except vanilla extract. Strain mixture through a sieve into a saucepan.

2. Heat over low heat, stirring constantly. Turn off heat when the cream starts to thicken. Continue stirring with the remaining heat.

3. Add few drops of vanilla extract (optional). Let cool completely.

4. Transfer cream into pastry bag (aka piping bag) and chill it in refrigerator.

Assembly
1. Cut the 9" sponge into 4 squares, then cut each squares into thin slices (laterally into 2 squares), so you'll have 8 thin squares total.

2. Place cake on plastic wrap (with browned side up). Pipe banana cream onto the cake, roll and securely twist the ends like a candy. Chill in fridge before serving. 
Thoughts: These tastes exactly like the real McCoy!! And they sit very prettily in my vintage mismatch trio tea set! One thing for sure is that you know the flavor comes naturally from the banana, not some weird tasting essence. I'd say they're more addictive than the real thing, maybe because they cost just a few dollars to make so I don't have to savour it in miniscule bites! I chomp chomp chomp, 3 bites and finished. On to unwrapping a new one. 
I'm greedy, I want to pipe as much creme pat inside as possible so they will ooze out when I bite into it. Oooohh yums... Hooray to "unlimited" supply of Tokyo Bananas!!


All blog posts and photos are properties of WhatToBakeToday (unless otherwise stated). Unauthorized use and/or duplication of these contents, whole or part thereof, without express or written permission from this blog's author is strictly prohibited. Excerpts and links may be used, provided that full and clear credit is given to WhatToBakeToday with appropriate and specific direction to the original content.