Basic Snowskin Mooncake

Let's face the reality. Most of us are suckers for cute things. I can't remember how many times have I fell into buying beautifully coloured snowskin mooncakes with cute/elaborate imprints at a premium price, either to realize that it's just the common lotus/red bean paste inside or cannot taste the whatever flavours the paste is supposed to be. I had 2 supposedly alcoholic snowskin mooncakes from a 5 stars hotel last year that tastes nothing like alcohol or any flavour at all. It was so bad I couldn't tell one apart from the other! Meh.


I've heard many people say, "How difficult can snowskin mooncakes be? It's just Kou Fen, Icing Sugar, Shortening and water!". True, those are the 4 components to making the "snowskin" dough but it's not easy to get the proportion correct so that the resulting dough is not too stiff, not too sticky nor too oily. Fried rice is just rice with egg, why is it still so difficult to get it right?
I've gotten the following recipe from attending Mr. Richard Goh's Mooncake making class some few weeks ago. Not that the previous recipe I used wasn't good, just that Mr. Goh's recipe yield a softer and smoother dough.

Snowskin Mooncake Dough

Mixture A (Do NOT modify anything in this section especially sugar)
 200g     Confectioner's Sugar (Powdered or Icing Sugar)
 150g     Kou Fien (Fried Glutinous Rice Flour)
 100g     Shortening

Mixture B
 150g     Water, COLD
     4g     Pandan Paste (adjust accordingly to preference)
  Few drops of food colouring
*Can substitute with any other flavours as per desired. 

1. Using a paddle attachment, mix together Mixture A.

2. Add in Mixture B and stops when it becomes a soft dough (about 2 mins). Overbeating will result in a sticky dough. Cover with damp cloth or cling wrap, rest the dough for 10-30mins. Without resting, the dough will also be sticky and breaks easily.

3. Process the dough into required size and wrap around prepared filling. Dust the exterior and mooncake mould with some Kou Fien, press and unmould. Chill in refrigerator (if too hard, thaw slightly to room temperature before consumption).
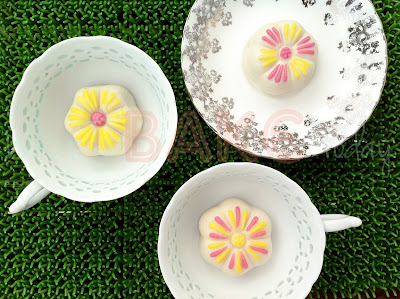
Thoughts: You can pretty much make any flavour you want with any fillings you like. This season, I made a whole range of different flavoured snowskin to go with the different fillings. Like our all time favourite - Durian snowskin with pure 100% Durian flesh! Yums!
I am such a person that once I've tried a recipe that works, I will not actively seek nor try another recipe. When I want to make a new flavour, I simply substitute, trial and error. Sadly, this recipe is not universally good. Some flavours turn out to be slightly harder or chewier than the others. I suspect it's probably due to the consistency of the cold liquid add, i.e. if using chocolate, the liquid is thicker hence a harder/chewier snowskin.
One major disadvantage home bakers have is the common misconception that it is cheaper to bake at home. Almost always true. It is cheaper most of the time since there's no other overhead other than the ingredient cost. But people tend to forget there's also no economies of scale and we don't get ingredients from suppliers, often we get from retailers just like everyone else or even specialty shops! And contrary to popular beliefs, packaging does not comes cheap, especially not when they are available in packets of 5's or 10's. I'd love to find a cheap source for 8" or 9" cake boxes. Anyone want to hook me up? It'll definitely save me load of time & effort checking out various baking supplies specialty stores periodically and lugging them home.

Anyhow, I hope all home bakers can still somehow find the reason to bake at home and craft our food carefully with love! =)


All blog posts and photos are properties of WhatToBakeToday (unless otherwise stated). Unauthorized use and/or duplication of these contents, whole or part thereof, without express or written permission from this blog's author is strictly prohibited. Excerpts and links may be used, provided that full and clear credit is given to WhatToBakeToday with appropriate and specific direction to the original content. 

Banana Muffin / Banana Cake

Just the other day, there was a small discussion on the issue of originality and crediting the source on the baking group I am in. I have to say there are quite a few intriguing perspectives; I couldn't help but kept thinking in retrospect and here's my after thoughts.

The question of "originality" is an age old problem. It exists across different paradigms and is simply inevitable.  Defining the term "original" has shown to be problematic as it is subjective and just means different things to different individuals. To some one, he/she might only call the first creator to be the "original" whereas others might simply emboss their names on the first creation after improvisation. Since after "modification", it is different from the original and hence, different. Anyhow, after thousands and thousands of years of human history, who's to say what's "original" anymore? lol

Regardless the case (or definition), we should make it a good habit of crediting the source, no matter the paradigm! It's just like doing citation when writing a thesis, and if you paraphrase, you will end up plagiarising. Haha..

I have to admit that when I first tried baking 5 years ago, I did not care much for the source. Then again, I was not managing a food blog so obviously I did not jot down the source. There are a few recipes which I used and modified over time, adjusting, adding and substituting ingredients as I acquire new baking knowledge, so much so that it lost the original's essence. Since they are heaven and earth apart, I can quite certainly claim the highly-modified one to be mine, but without the recipe which I copied years back, will I be able to come up with the current one? 

While on this topic, I would like to state that all recipes here (except for the first which I did mention that I pieced from all over the internet), unless otherwise stated and properly credited, are "original" creations in the sense that I did not took them off any sources. Some of them belongs to the seniors in my family and some just came along with experience (especially the cooking recipes). There are, of course, some recipes which I anyhow threw together like a science experiment, trialled and error till I'm satisfied so any resemblance is really coincidental. *cough*madeleine*cough* LOL!

Let me finish this post with a recipe I ripped out somewhere during my first few bakes yonder ago. It is a super moist and fluffy basic banana muffin recipe which I've tuned to my family's (and my) liking over the years. If you would like to try the recipe and credit the source, you may credit it to "somewhere ripped off in the digitized world of cyberspace ". Ahahaha..  =D
Basic Banana Muffins / Cakes (makes 12-15 depending on liners)
(This is a highly-modified version, original source lost and consumed by the sea of data)
 190g     Cake Flour
  2.5g     Baking Soda  
   10g     Baking Powder
  1.5g     Salt    
  1.5g     Ground Cinnamon
   75g     White Sugar  
   75g     Brown Sugar
 120g     Butter, unsalted  
    3        Large Bananas, cut into smaller pieces (about 1 cup)
 100g     Milk  
    1        Large Egg    
     4g     Vanilla Extract

Optional:
 - Walnuts / Almonds
 - Chocolate Chips (dark, white, milk)
 - Peanut Butter
 - Cherries / Raspberries / Cranberries

Actually almost anything you want and however much you want. This recipe comes with a disclaimer though.  I utilize the Creaming method instead of Muffin method. >.< *ieks*

I know, I know.... muffins, hence muffin method, yet this is a cake! But hey, Mum wants a softer "muffin", I'm just trying to be a filial daughter. =P

Anyhow, can always use this recipe with the muffin method but remember to crank the temperature up to 200ºC instead, bake about 20-25 mins till cake tester comes out clean too.
Preheat oven to 175ºC

1. Sift Cake Flour, Baking Soda, Baking Powder, Salt and Ground Cinnamon together and whisk to combine. Add in dry additions like Chocolate Chips (if any) and toss with flour.

2. Dissolve the Instant Coffee Granules into the Milk, stir in the Vanilla Extract. Whisk till homogeneous and reserve.

3. Using the paddle attachment, beat butter till creamy. Add both sugars and cream till light and fluffy, about 5-8 mins in a stand mixer. 

4. Add in the Egg and wait till fully incorporated before adding the Bananas. Stop when bananas has "disintegrated". Heeheee..

5. Add in Flour mixture in 3 additions, alternating with the Milk mixture, waiting for each to be well incorporated. Ie. Flour -> Milk -> Flour -> Milk -> Flour. Mix briefly on medium speed till a smooth batter is formed. 

6. Spoon into desired liners/cases, filling 3/4 to the brim. Bake for 20-25 mins till cake tester comes out clean. Leave them on the baking tray for a few minutes before cooling completely on wired rack.


All blog posts and photos are properties of WhatToBakeToday (unless otherwise stated). Unauthorized use and/or duplication of these contents, whole or part thereof, without express or written permission from this blog's author is strictly prohibited. Excerpts and links may be used, provided that full and clear credit is given to WhatToBakeToday with appropriate and specific direction to the original content. 

Sambal Petai

Parkia speciosa, sometimes known as bitter beans but more commonly known as the Stinky Beans (臭豆), is one of those food that evokes extreme reactions from its consumers (e.g. Durians). Either you love them to bits, or you hate them to its core. I've heard people relating its smell/taste to a sewage drain, dried T-shirt previously soaked with sweat, and fart. The last one is the most interesting and I think it was my sister who thinks so. Haha... To petai lovers like me, its pungent smell/taste is unique, the more I chew, the more "fragrant" it gets. Due to the pervasive smell, there is little wonder why the nickname. And this does not stops here. Thanks to Petai's amino acids and complex carbohydrates, it will taint your breath and bodily excretions for the next few days. Ironically, this includes your fart. XD
If you manage to get past (or come to terms with, rather) the peculiar smell/taste, Petai beans actually have loads of health benefits for us. Just do a Google search and there is a whole long list. I'm not sure if it's the sambal or the beans themselves but I've always experience smoother bowel movement after consumption. Hahaha... 

Petai beans are just one of the many acquired taste "trained" by my grandfather (阿公 - Ah Gong) and grandmother (阿嬤 - Ah Ma). Apart from Petai, they kick-started me with things like Coffee, Beer (ssshhh.... >.<), weird parts of a chicken (chicken feet, Parson's nose, chicken neck), pig's blood & brain (sadly, cannot consume them in SG anymore), Tempeh, Tapai Pulut and a whole load of other things you won't normally feed a toddler. My Ah Ma was a wonder woman, she speaks Hokkien, Teochew, Mandarin, Malay and Tamil! She loved hanging out at Geylang Serai market, and I always tagged behind as she did marketing. She loved this dish as much as I love it. Without her, I probably wouldn't even like or know about this dish. All credits for this recipe goes to my beloved grandma.
Sambal Petai
(Please credit if you've enjoyed it. Thank you!)

200g     Petai Beans

  20g     Ikan Bilis
  50g     Sambal, homemade or store bought
125g     Minced Pork (may omit or substitute with other meat)
  40g     Water (adjust accordingly)
  Salt to taste
Preparation work:
  • Deep fry the Ikan Bilis until crispy. Drain on paper towel and reserve.
  • Split each bean into half, check for germinated or bad seeds. Mum did told me to remove the tiny shoot as it induces bitterness when eaten (just like Ginko nuts) but it never bother me so I left them on. The real thing to look out for is big fat worms that might have burrowed into the seed and gorged itself on the nutritious bean. Wash the beans to rid of the white sap after splitting. 
This is the main reason why I've never wanted to cook this dish on my own. Preparing the seeds are quite tedious and time-consuming. And the fact that I have Vermiphobia doesn't help at all. Everytime I get a "kinder surprise" inside, I'll involuntarily throw the seed and fling my knife, takes a short while before I "recover". LOL! Rest of this dish is easy peasy. =)

1. Heat a tablespoonful of oil over Medium High heat, stir fry the Sambal till fragrant and colour has darken slightly.
2. Add in the minced pork and stir fry till meat is no longer pink.

3. Add in the Petai beans, drizzle in the water accordingly to how "wet" you want the dish. Season with salt to taste. Stir fry for about 3mins for 'al dente' beans.
4. Return the crispy Ikan Bilis to the wok. Mix evenly and serve immediately.
All the elements are adjustable, add more or less according to preference. This dish is like hay bee hiam to me - spicy, salty and fragrant. I can eat 2 bowls of rice with this alone. Then I'll reek of it for 2-3 days. Hahaha!


All blog posts and photos are properties of WhatToBakeToday (unless otherwise stated). Unauthorized use and/or duplication of these contents, whole or part thereof, without express or written permission from this blog's author is strictly prohibited. Excerpts and links may be used, provided that full and clear credit is given to WhatToBakeToday with appropriate and specific direction to the original content.